Getting the best results from Camo
Just using Camo's features alone will improve the picture you get from any webcam, phone or connected camera, but you'll get the best results when you combine Camo with some attention to your camera placement, lighting, sound and scene. Once you have Camo up and running, use these tips to help you move your video forward even further.
Mounting your device
Where you position your camera for video can make a huge difference to how your picture looks. We recommend that you position your device around eye-level, and as close as possible to where you’ll be looking. This makes for a more natural, familiar, and approachable shot.
How you mount your camera can be just as important. A well-chosen mount can help steady your video by reducing unwanted vibrations and shaking in your environment (users running Camo in iOS can also take advantage of Camo’s built-in video stabilisation). It can also make the process of meeting, streaming or creating good video much easier, both by being easily moved and having a minimal footprint.
For this reason, we recommend taking a look at swing-arm or boom mounts for your webcam, phone or camera. These come in a variety of sizes and price points, but as with any mounting solution you'll want to make sure that it's sturdy enough to support your device. Also note that unless your device comes with a built-in screw mount, you may need purchase a separate accessory, e.g. a phone mount holder.
Another good option is a simple extending desk stand. It won't dampen vibration, but its footprint is minimal, and it can be a good option for traveling setups. If you want to learn more about mounting options specifically for your phone, check out our guide.
Refining your lighting
Standard home lighting setups aren't typically conducive for great video, but a bit of simple rearranging and minimal investment can deliver instant improvements. For a basic setup, make sure that your strongest light source is located in front of you at eye level or higher, with a level of brightness that doesn't overpower your camera's sensor. From there, you might move up to using a dedicated video light (or at least daylight temperature light bulbs), softening your light sources with diffusers, and evenly lighting your background.
For those who want a truly professional look, there's the three-point lighting system. For this, you'll place the strongest light source (key light) 45° in front of you, either to your left or right; a slightly less powerful fill light or reflector at the same angle on the other side; and a rim light pointed down at your head from behind. You can use any lights to do this, but dedicated, dimmable video lights will give the greatest control over brightness and color temperature.
To find out more about different lighting types, and see our recommendations, check out our guide on how to get the best lighting.

Improving your audio
However amazing the picture is, no great video is complete without solid audio. To improve yours, you might consider upgrading from the built-in microphone in your computer to a dedicated USB mic. These come in a wide range of types, but for most use cases a good cardioid microphone will do a great job of isolating your voice and reducing unwanted noise.
There are also some practical changes you can make to improve the acoustic quality of your space. Think soft and insulating - adding curtains to windows, laying a rug on your floor, and tossing a throw over a chair will all reduce sound reflections in your space. From there, you might consider adding some acoustic foam panels to your walls or ceiling, and perhaps a pad on the table or desk in front of you.
Most video meeting platforms will allow you to select any microphone connected to your computer as your audio source. When using Camo during a meeting, we recommend that you select your microphone in Camo first, and then choosing Camo as your audio source in the meeting platform's settings. This will help keep your video and audio in sync.
To find out more about optimising your space and choosing a microphone, check out our guide on how to get the best audio.
Optimising your settings
If you're using video to meet or stream, we typically recommend that you match your resolution output to your video service’s capabilities. Most video services will automatically downscale picture quality, making your video look worse, and causing your picture to lag - you can read more on this subject in our FAQ section.
On the other hand, if you want to record in the maximum resolution available on your dedicated camera, make sure that you use a cable that will support it. You’ll need a USB 3 or HDMi cable to capture 4K video, and your device may require a connection through a video capture card.
Also, make adjustments in Camo Studio wherever possible, rather than using other software. If you’re using your phone as a webcam, the phone’s dedicated graphics processor powers Camo, meaning that any adjustments and enhancements you make within Camo won’t slow your computer down. Using image adjustments from other software can cause your image to lag, or your audio and video to drop out of sync.
Finally, for those using their phone as a webcam with Camo, we recommend choosing the more powerful rear camera on your device over the selfie lens. There’s no need to see your phone screen when you’re using Camo, as all the controls are accessed from your computer, and the rear camera will give you the highest quality picture.
Setting the scene
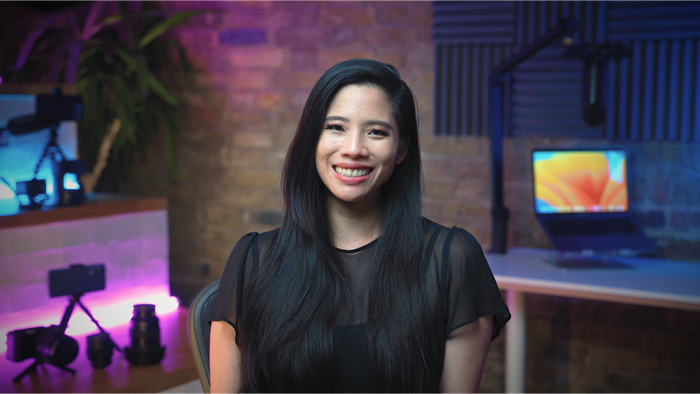
An excellent video shot is not just about having a well-lit, good-sounding subject - it involves your surroundings, as well. Whether too stark or too busy, a neglected or poorly-arranged scene can be distracting, erode your credibility and weaken your message. On the other hand, a well-planned and balanced background can give helpful context, express individuality and give your ideas greater impact.
For quick improvements, try combining Portrait mode with zoom to keep the focus of your video front and centre, rather than on your surroundings. Portrait mode will blur your background slightly, keeping you in focus, while the zoom and pan function can help crop out distractions. Next, ensure that the lighting behind you is not stronger than the lighting in front, and that the area directly behind your head is clear of distracting elements.
From there, you can work on filling in empty spaces with some shelving, art, plants, etc., or decluttering a busy background by arranging objects into tidy groupings of three.
For more tips on setting the perfect scene, see our guide on setting up your environment.
Wi-Fi vs USB connections
Camo supports connecting your iOS or Android device to your computer via Wi-Fi or directly through USB. If you need help doing either, we'll walk you through the steps.
In many cases, the ease of Wi-Fi connectivity is ideal for setting up your device wherever and however you want to. This may be with simple desk mount, but going wirelss also opens up a range of new options. It can also be more convenient for quick calls: just open Camo, mount your phone, and add it in Camo Studio.
As with any wireless connection, the latency and consistency of the video sent from your device to Camo Studio over Wi-Fi can vary depending on network conditions, such as a poor connection to a local router or a sudden spike in activity.
This is particularly true on macOS due to how it handles switching between different wireless modes and connections with various devices. Camo minimises the effects of these by introducing a slight delay to the video, on macOS only.
For users looking for the smoothest video experience, we continue to recommend connecting your device directly to your computer using a high-quality USB cable. This will be more important if you are recording video for distribution (e.g. on YouTube or elsewhere), or for other production purposes.
Avoid interruptions
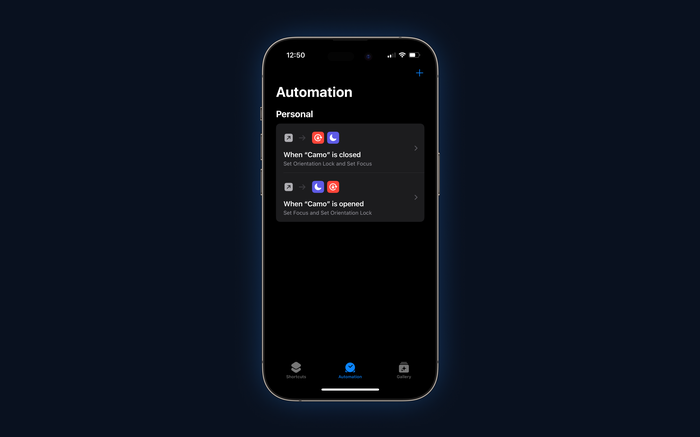
Having a random text or notification interrupt a flowing recording session or important call can be deflating. To avoid breaking your focus when using your phone as a webcam with Camo, we recommend enabling Do Not Disturb and turning off Orientation Lock to keep your calls distraction-free. We wrote a guide on how to use Shortcuts on iOS to automatically turn these settings on when you open Camo, and turn them off when you close it.


by Garric Nahapetian
Loving Camo and new portrait mode feature. Does portrait mode work with all iPhone models? If not, is there a list of supported iPhone models? Does it worked with iPod Touch models that have a rear camera? Reason I ask is because I'm thinking about buying an iPhone/iPod Touch to use as my permanent webcam so I dont need to worry about setting up my phone every time.
reply by: Reincubate Support
Thank you Garric! "Portrait mode" works with the iPhone Xr and any newer devices. There aren't any iPod Touch devices that are capable of this just yet. And yes, the compatibility info is here.