How to get the best audio for online meetings, streams and videos
Whether you create content, stream, or simply take part in meetings online, you're probably well acquainted with the acoustic qualities of your workspace, as well as the shortcomings of your computer's internal microphone. For most of us, they make a resoundingly bad combination - unless you work in an insulated recording studio, chances are good that the sound you're capturing on your video is a sonic free-for-all, with traffic noise from the street outside mixing with the whir of your computer fan and the echoes of your distant-sounding voice, all set to the unhelpful rhythm of footsteps on the stairs and the clicks of your mouse. For many, it makes turning off the Mute option during a meeting an act of sheer recklessness.
If your goal is to have your ideas connect with your viewers, this is a problem. As any filmmaker or content creator will tell you, sound is a vital part of the visual experience. It's why every film or TV production has a dedicated sound crew and editor, and why there's an Oscar category devoted to recognising the best among them. Imagine hearing a passing airplane during 12 Years a Slave, or the whirring and creaking of the Steadicam equipment during the beach scene in Atonement. Both would have snapped you out of the compelling viewing experience. Even if you aren't working with A-list talent or hundreds of extras, the same is true for your video. The audio you capture can either drag down or elevate your engagement with your audience.
So maybe it's time to think like a bit more like a sound mixer, and devote a bit more attention to audio, even as you work to improve the quality of your visuals with tools like Camo. This means limiting unwanted ambient noise that distracts viewers, while boosting the clarity and quality of what you want them to hear. Fortunately, this doesn't require a Hollywood budget - there are improvements that can be achieved without purchasing any additional hardware, and some great microphone options out there that won't break the bank. Every little change can help, though making some basic alterations to your space in combination with a microphone upgrade will yield the best results.
In this guide, you’ll find the following topics:
-
The short history and significant limitations of mobile phone and built-in computer microphones (basically, why you’re reading this in the first place)
-
The simple steps you can take to check the sound quality of the microphone you're using
-
Some practical recommendations for improving the acoustic qualities of the space you have, whether or not you plan to invest in an external microphone
-
A brief exploration/demystification of the world of microphones, after which you’ll be able to confidently distinguish your condenser from your dynamic, and your cardioid from your omnidirectional mic
-
Our tests and recommendations to help you find the best microphone for your specific space and needs
-
A few recommended software solutions for cancelling uncontrollable background noise while recording, and for repairing or boosting your audio quality afterward
The Good, the Bad and the Tiny: A Short History of Built-in Smartphone and Computer Microphones
Today’s smartphones, laptops and PCs represent the cutting edge of technology, with powerful chip technology and amazing graphics capabilities packed into small, elegant form factors. If you have a laptop with a fairly recent chipset, it's likely that you're carrying around something that would have been considered a supercomputer just twenty years ago, and the stuff of DARPA fantasy just twenty years before that. But for all the billions in R&D that has gone into these machines, the microphones built in to them have remained remarkably unchanged from landline telephone technology that's almost a century old.
The reasons for this technical imbalance are historical and practical. Though a primary function of all microphones is to pick up vocal sound waves or vibrations for translation into electrical signals, the devices found in phone receivers were originally tasked with doing this over long distances, and - with the advent of mobile phones - without overloading cellular networks. These parameters limited the frequencies of sounds transmitted by phones to a much narrower bandwidth than the normal range of human hearing - basically, auditory throttling.
Thus, whereas our ears can capture sound within a range from 20 to 20,000 hertz, and the human voice can range from 100 to 17,000 hertz, both older telephone receivers and most built-in microphones today typically capture a range from just 400 to 3,400 hertz. This is called narrowband or voiceband, and is the primary reason that voices over the phone have always had such a distinct, tinny quality.
Over time, as phones became smarter, the microphone function was one of the few parts of the device that did not see constant reworking. This was partly out of sheer practicality: people talking on mobile phones were often surrounded by a world of sound - honking cars, barking dogs, the hum of machinery - and limiting microphones’ sensitivity actually helped block some of the unwanted noise. Making phone microphones more sensitive might simply make people harder to understand.
In fact, for most phone makers and carriers, the main impediment to serviceable audio has actually been the quality of a signal, and both industries have devoted much of their attention to ensuring that phones get steady, consistent connections to each other over a wide, stable network. The complaint that calls were completely unintelligible or had suddenly dropped no doubt greatly outweighed any quibbles about the lack of a full, rich range of sound in a conversation.
The microphones you'll find in your smartphone and computer, then, are small, fairly blunt instruments that come in two types: electrets and MEMs, with the latter rapidly taking over as the most common. The electret is essentially a very small omnidirectional condenser microphone (more on this later), while the MEMS (MicroElectrical-Mechanical System) is a microphone etched into a chip. Both take up very little power and space, are cheap to make, and can be fun to do a bit of science with. Because of their small size and minimal power needs, several microphones are often packed into a smartphone design, enabling audio capture from both sides of the phone, with the sound source positioned either close or several feet away.
On your laptop or desktop computer, the microphones are typically located either under the keyboard or close to the built-in camera. Many are the exact same ones used in mobile phones, while others have a bit more power. Either way, they are engineered for the same basic function as the ones in your phone: to capture with a modicum of clarity and at a range of distances the general frequency range of the human voice. This may work fine for casual conversations, but it's not great if you're trying to create a professional product that connects with the eyes, ears and hearts of your audience.
Testing, One, Two, Three
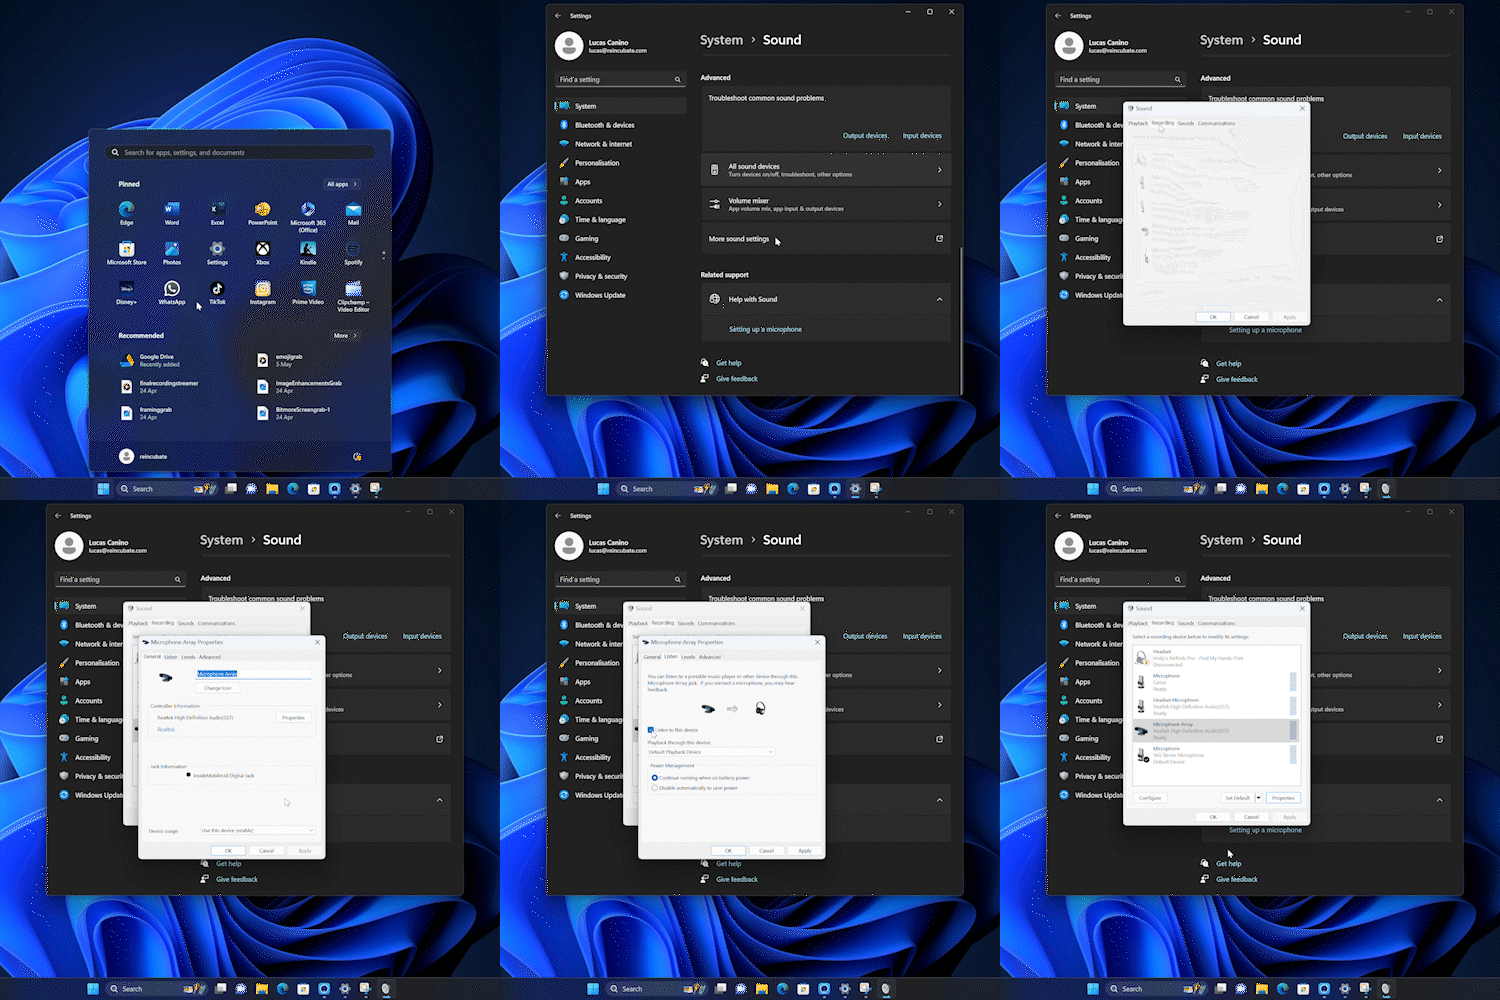
Don't just take our word for it. To hear exactly what your built-in microphone is picking up, and how your space and voice sound to others, you simply need a set of headphones. If you have an XLR setup, you can plug your headphones directly into the corresponding jack on your audio interface; and if you have a USB mic, there may be a headphones port on its bottom end. If it doesn't, you can simply connect your headphones directly to your computer and access the audio functions that come standard on most Macs and PCs. Just click on one of the videos below to see the steps you'll need to take.
Once you're plugged in and ready, just take a moment and listen. What you hear when you do this for the first time may surprise you. Even without speaking, you may find that there's a lot to hear - perhaps the hum of your home's heating or air conditioning system, or the washing machine downstairs. If you move your hands around on your desk, chances are good you'll hear that, too. Since the microphones on laptops are often located under the keyboard, each keystroke will sound much louder, and any movement on the trackpad or mouse will register. Your body is actually closer to the microphone than your mouth, so you'll have to sit almost completely still if you want to eliminate a lot of unwanted noise.
When you do speak, you'll hear your voice as it sounds after being translated into electrical signals and funnelled through a narrowband frequency range. If you detect an echo, it's just that sound waves from your vocal cords are bouncing off the walls around you and arriving at your built-in microphone just a fraction of a second behind the more direct sound waves. None of this makes for an especially pleasant or absorbing experience.
Acoustic Feng Shui: Improving your Soundspace
Fortunately, even though you can’t do much to improve the microphone in your phone or computer, you can make physical alterations to your workspace that will significantly improve the sound quality of your video, all while making your environment a bit more pleasant to be in. Whether you consider it Acoustic Feng Shui or Hearing Hygge, by thoughtfully selecting and arranging the furniture and other materials in your environment, you can capture better sound without spending a dime on new equipment.
You also don’t need a grand space to work in. Though you might wish you had a bit more real estate for your home office or studio, when it comes to acoustic environments for video, you’ll be happy to hear that cosy is king. You’ve probably seen a sound booth, if not in person, then in a film or on a television show. It’s that small room with grey or black geometric panels covering the walls and ceiling, with a fancy microphone and perhaps Snoop Dogg in it. It may stand in stark contrast to the massive stadiums where singers hold their concerts, but it’s in confined spaces like this where sound can best be controlled.
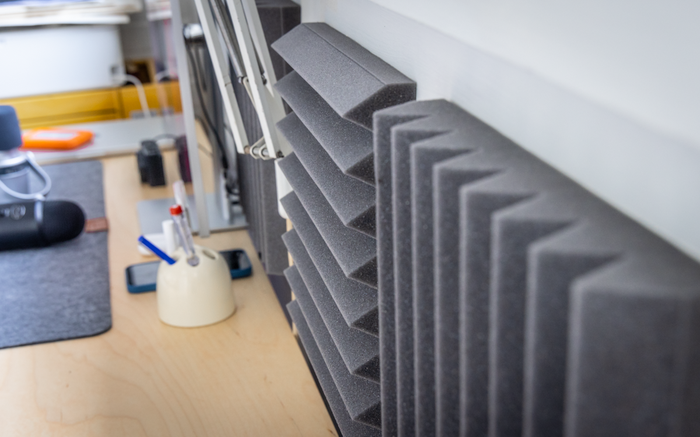
And that wall covering is not just for looks. Those panels - called acoustic foam - are a powerful tool for improving sound quality. Thanks to their material and shape, they absorb or break up sound waves, reducing reverberation or sound reflection. This produces what is called an anechoic environment: sound hits the walls and ceilings, and like a deflated basketball, doesn’t bounce anywhere. The only sound that hits the microphone comes directly from the singer or speaker’s mouth, with no competing or muddying echoes. The price of a large box of panels is not very high, and they're fairly easy to find online, both in the UK and US.
For those who don’t want to take the step of covering their walls and ceiling either partially or entirely with foam, there are other options that will still improve the sound-absorbing qualities of a work space. Replacing window blinds with curtains, draping a throw over a chair, and putting a larger rug on your floor will all help absorb sound, reducing echo. Hanging textiles on your wall will boost the space even further, not just in terms of sound but for staying on-trend. There are additional benefits to these changes, as well: your space may feel more pleasant to work in, and the room will become more energy efficient.
Once you’ve insulated your hard surfaces with some textiles, you can then direct your attention to your furniture layout. If your desk is sitting directly in front of a single-glazed window, and you want to keep your curtains open, consider moving it against a different wall. Most home window glass is hard and thin - two qualities that can make it even worse than a bare wall in terms of acoustic resonance.
The corner of the room is also not a great place for your desk. Acoustically speaking, corners are perhaps the worst place to work. For one thing, the soundwaves generated from your voice will hit both walls, and then reverberate energetically at different angles and speeds, resulting in increased echo when the waves hit your microphone. Essentially, the walls in your room act as waveguides, conducting waves from around the room and concentrating them in the corners. It may be an efficient use of space to place your desk there, but it will make your efforts to improve sound quality much more difficult. Instead, try moving your desk away and substituting a comfortable chair, perhaps topped with a cushion or throw for good measure. And don’t stop there - filling out your space with furniture, plants and objects can improve its sound absorption dramatically.
Finally, think about insulating your room from intrusive outside noise. Your curtains, once drawn, will already help with this, but when the time comes for that presentation or content creation, think of the room as your own little James Cameron deep-sea submersible - any leaks or excess noise get in the way of a good experience (in case you're wondering, the Na’vi word for unwanted sound is hawmpam). Close your doors and windows, and perhaps even use a draught excluder or towel where the door doesn’t quite meet the floor. Then turn off any external noises you can before recording, streaming or meeting - loud fans, washing machine, etc. If your computer fan gets loud, try reducing how hot the machine gets by using software.
All of this can improve the quality of audio you record; however, none of the actions change the fact that the microphones in your phone and computer are still quite limited in terms of their frequency range and directional pickup options. If you want to capture truly professional sound to match the professional quality of your video, you’ll need a microphone designed to capture the full resonance and texture of your voice, in an environment that’s most similar to your own.
The Wide World of Microphones
At this point, you may be ready to make the leap and invest in a microphone that will raise your audio game to the next level. We’re happy to make some recommendations, but before we go any further, it may be helpful to have a quick look at the terms you’ll encounter when looking for the best audio solution. The jargon might seem daunting at first, but the terms you’ll hear or read simply distinguish how a microphone is designed and powered, and how it gathers acoustic information. Here’s a list you can refer back to as you navigate the options:
Diaphragm: The thin membrane within a microphone that vibrates in reaction to sound waves. Large diaphragms (1” or more in diameter) have excellent low frequency response, making the source sound larger and lusher, while small diaphragm mics (½” or smaller) capture more natural, detailed sound. The former are often used for professional vocals, and the latter for instrumentation or orchestras.
Transducer: The part of the microphone that converts vibrations into an electrical signal. The following three microphone types are classified by transducer type:
-
Condenser: A microphone that uses a thin, electrically-charged diaphragm to generate an electrical signal when it vibrates. It's sensitive, with a wide frequency response and dynamic range - ideal for picking up delicate sounds in a studio environment.
-
Dynamic: A microphone that uses a wire coil to amplify the signal picked up by the diaphragm, much like a loudspeaker. It is typically less fragile (and less expensive) than a condenser mic, and excels with louder sounds and noisier spaces.
-
Ribbon: A microphone that uses vibrations of an extremely thin aluminium foil ribbon - rather than a coil - to capture accurate, detailed sound. Great for capturing instrumentals, and typically expensive and very fragile.
Phantom power: Type of DC voltage power used with condenser microphones, called so because there is no obvious power source. The mic is connected to a mixer or audio interface, which direct voltage up the same wires that the audio signal is travelling down, powering the active circuitry in the microphone. This is typically enabled by an XLR cable, which also permits the capture of larger, more dynamic sound files than are available with a USB connection.
Polar patterns: These define and describe a microphone’s sensitivity to sound in different directions. Below are the different types you'll most likely encounter:
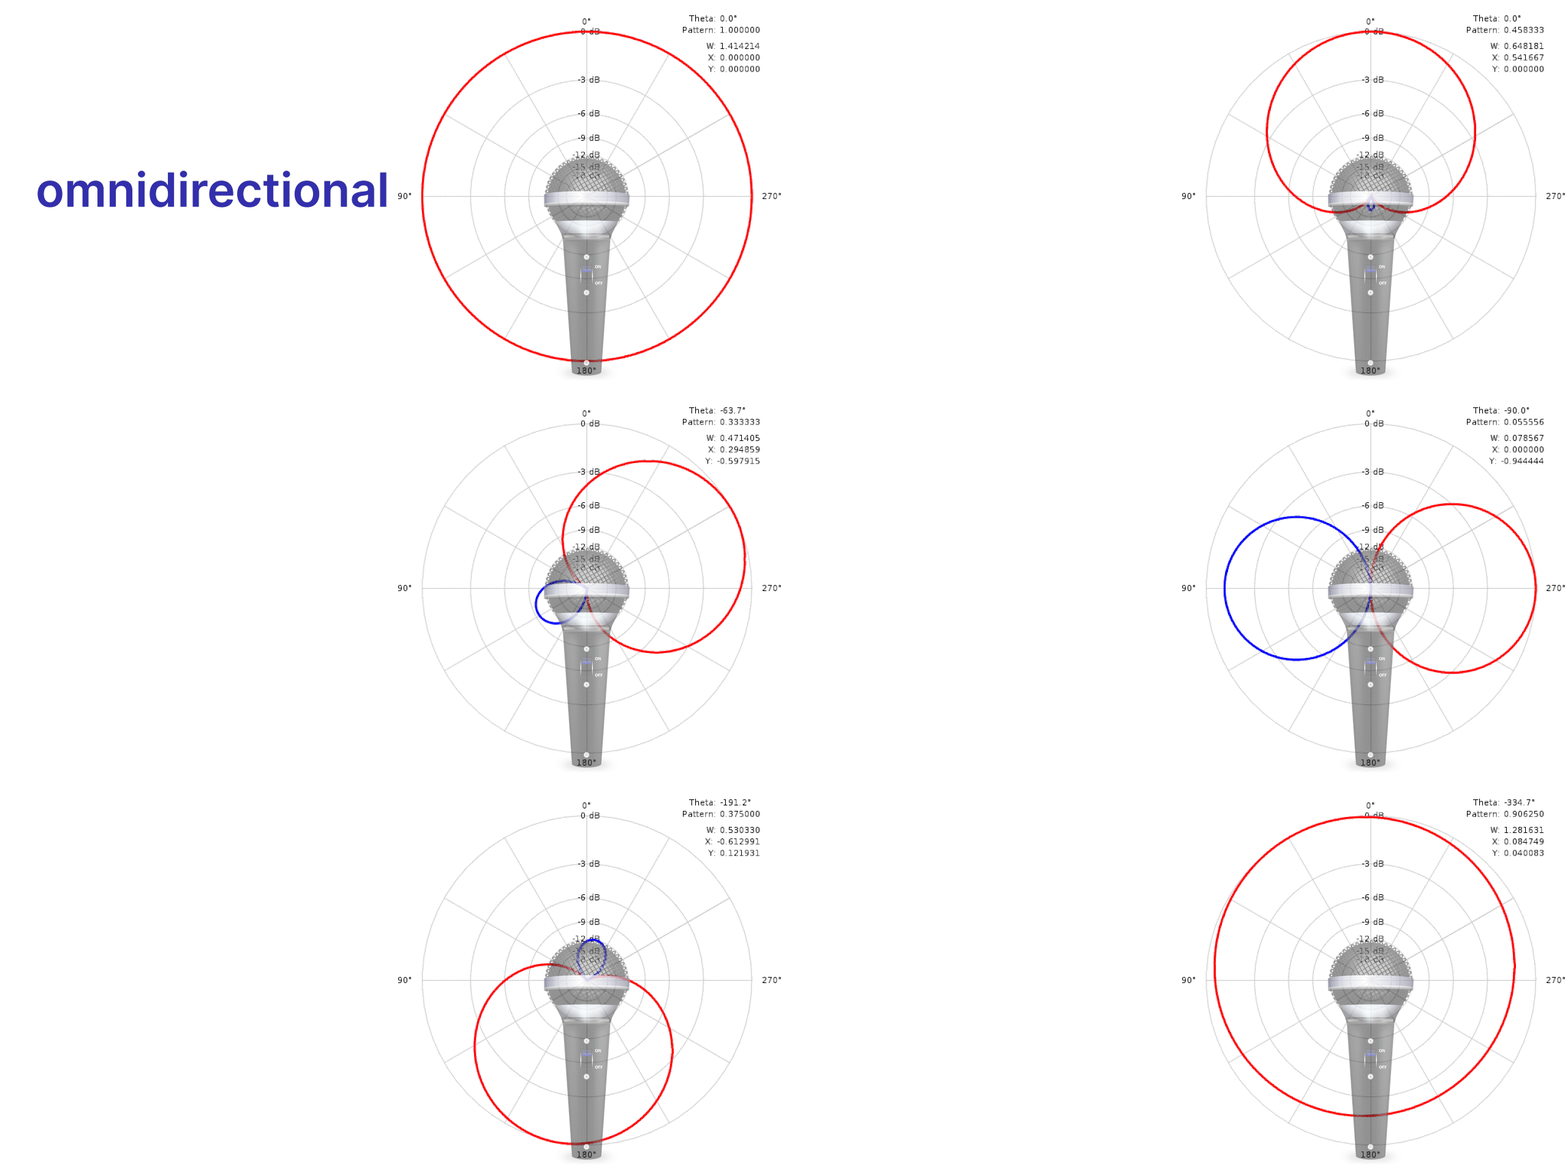
Omnidirectional: A spherical pattern of sound pickup that collects sounds equally in all directions. Most, if not all, internal microphones (like the one in your computer) are omnidirectional. When close to the sound source, a good omnidirectional microphone can be fairly good at tuning out constant low level background noise (gentle, consistent traffic outside, the hum of air conditioning, etc), but it will be less effective at blocking out louder, one-off sounds, like closing doors or barking dogs.
-
Cardioid: A unidirectional polar pattern that is very sensitive to on-axis sounds (where the mic points), while being slightly less sensitive to sound coming from the sides, and rejecting sound coming from the rear. In a relatively controlled environment, it works well for isolating the speaker's voice from computer noise and sound reflections.
-
Bi-directional or Figure 8: A polar pattern often used for various stereo recording techniques. It has the greatest side rejection of all polar patterns, so it can be useful when dealing with sounds bleeding in at 90°.
-
Shotgun: A highly directional polar pattern that concentrates sensitivity to sound along one axis, with sharp fall-off along the sides. Shotgun mics are great for recording sound at a distance, making them ideal for outdoor filming. They can also be useful in a home setup where the user is stationary and would like to position the microphone well outside the frame.
Lavalier: Not a polar pattern, but rather a type of small microphone that typically attaches to clothing, and allows both hands-free operation and greater mobility.
There are of course many more terms and technical descriptions that we could delve into, but knowing the general transducer types and polar patterns is a good starting point for exploring the best options for your own particular use and environment. While there is a wide range of pricing options (if you have a bit more than $10,000 to spare, you can splash out on the Brauner VM1S, a dual-large-diaphragm multi-pattern stereo tube condenser), but here we'll be looking primarily at microphones that don't require a professional-sized budget or the skills of a veteran sound engineer. Even with some budget options, you'll be able to move your sound quality quite far ahead of what your phone or computer are capable of delivering on their own.
Micmaker, Micmaker, Match me a Mic
Now, let's put our new technical awareness to work, and look at some hardware. Though the precise needs of your workspace and use case are unique to you, we’ve found it helpful to divide our recommendations into a few primary categories. We'll start with a budget pick that will provide a solid step up for anyone moving up from using a built-in microphone, and then move to options that will provide professional sound reproduction for a range of purposes and environments.
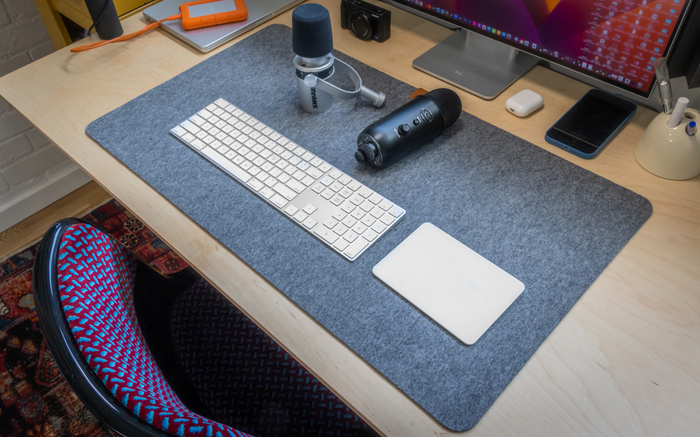
For its price, the Blue Yeti is a lot of microphone. In fact, it does its best to be four microphones, giving you the power to select from four polar patterns: cardioid, omnidirectional, Figure 8 (bi-directional), and "Stereo." This confers a bit of flexibility if you're going to be using your mic for multiple use cases, e.g. creating video and conducting in-person podcast interviews, as well as different options if your space tends to be quiet one day, and noisy the next. Just note that the phrase “jack of all trades, master of none” is apt when it comes to this piece of hardware: the Yeti does a fairly capable job across a range of uses and spaces, but isn’t as good at any of them as a quality dedicated cardioid or bi-directional microphone might be.
Where it does excel is in its simple plug-and-play functionality. The manual that comes with the Yeti is a masterpiece of brevity, mainly because there’s not too much you can’t figure out yourself. As a USB microphone, it connects directly to and is powered by your computer, with no special downloads required to make it work or calibrate it. It will be instantly selectable on Camo, your meeting platform, and pretty much any other software you use for video.
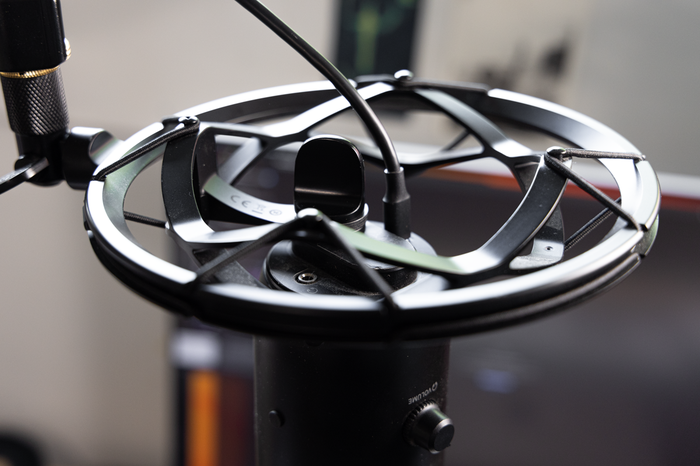
Of course, this doesn’t mean you shouldn’t pay attention to how and where you position this microphone. When used in cardioid mode, which is probably how you’d have it set most of the time, the Yeti will be optimally positioned about four inches (10cm) from your mouth, with the side featuring the Blue logo facing you. It typically comes with a stand to lift it off the desk a bit, but to get into optimum range, you’ll either need to prop the stand on something else, or employ a boom arm to position it directly by your mouth (using an arm or shock mount - or both - will also help even out vibrations from your desk that might otherwise get picked up by your microphone.
Once you have the Yeti mounted properly, with the gain dialled in, you'll have audio that's a significant step up from anything a built-in microphone can capture. It's not sound that an audio professional would call "nuanced," but you'll happily be saying good-bye to clipped frequencies - the Yeti has a frequency range of 20 to 20,000 Hz, encompassing the full range of human hearing. And if you want to optimise the sound even further, Logitech - the maker of the Yeti - offers the Blue Vo!ce software as a free download through its G Hub. We haven't yet had a chance to play with it, but Logitech promises "studio-quality vocal communications" made possible by an array of noise-filtering and voice-boosting tech. Even without using their proprietary software, though, we found that the Blue Yeti far outperformed its price tag once we got it optimally positioned.
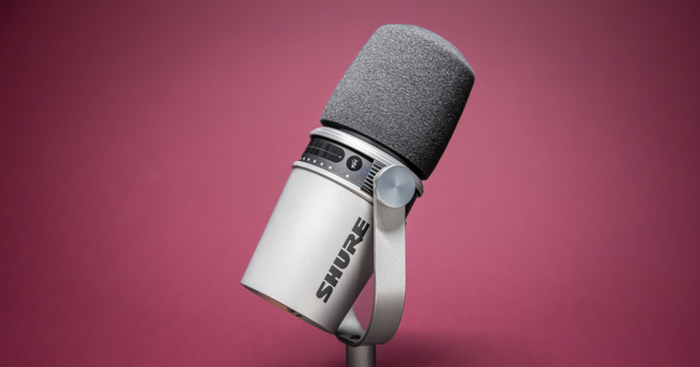
A solid step up in quality (and price) from the Yeti is the Shure MV7. There's a reason that this dynamic cardioid mic appears in the frame of so many popular streams and videos - it delivers rich, professional vocal sound reproduction, can be easily calibrated with the help of Shure's own MOTIV app, and gives users the choice of powering it via either USB or XLR. Thanks to its strong rejection of off-axis noise, it can also be used in less-than-ideal sound conditions. As with the Yeti - or really, any microphone - you’ll just need to have it mounted and calibrated correctly to capture the best possible sound.
The MV7 collects sound directly from its top end, so you’ll want to mount it so it’s pointed directly at your mouth. Its sweet spot is just a couple of inches from your face, but this can be extended to about 18 inches if you’d rather not have it looming large in the frame (just remember that the further you are from the microphone, the more ambient noise it will capture). Like the Yeti, it can be monitored directly through a headphone jack in the microphone itself.
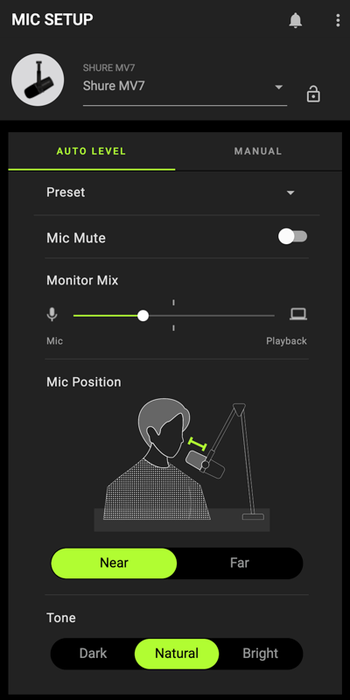
When you connect the MV7 via USB, the free ShurePlus MOTIV app does a great job of calibrating the mic so you can quickly get up and running with solid sound. If you simply select ‘Auto Level,’ all you need to do is let the app know whether the microphone is mounted near (1-6 inches) or far (6-18 inches), and whether you'd like your voice to have a Dark, Natural or Bright tone.
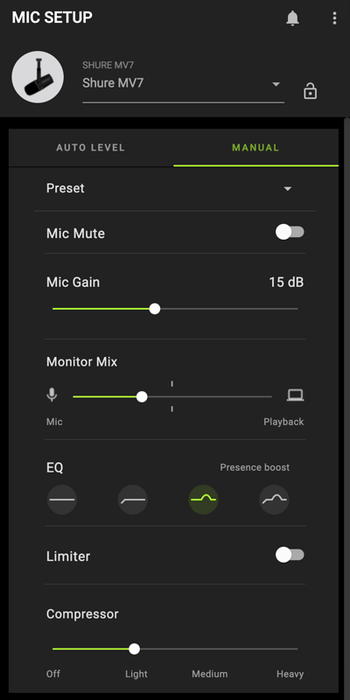
Choosing ‘Manual’ permits you to plug in your headphones and take more active control. You can set the gain, choose an equaliser setting to adjust volume of certain frequency bands, activate the limiter to prevent sudden spikes in volume, and turn up the compressor to reduce the span between the softest and loudest elements of an audio signal - and then save it all to a preset.
Chances are you’ll be perfectly happy with the USB connection and controls of the MV7, but if you use video for something like in-person interviews or music performance and instruction, you can choose to power it instead with an XLR cable and audio interface (we like the Scarlet 2i2). This alone may not result in a hugely noticeable improvement in sound - for that you’d either need a more expensive audio interface with a more powerful preamp, or a booster like the Cloudlifter - but it will enable you to record with additional microphones. The XLR connection will also produce higher-resolution audio files, which can be helpful if you're doing sound editing in post.
Whether you stick with the simplicity of USB, or go all in with phantom power, The Shure MV7 will take your sound a huge leap forward, not only from any internal microphone, but just about any other USB mic out there. The only drawback may be the price - at around £250/$270, it’s not cheap - but if it’s something your budget can accommodate, it may just be one of the best purchases you’ve ever heard.
The RØDE NT1-A (kits for ~£150/$200)
Condenser microphones are sensitive souls. Physically, they can be quite delicate, and most require a quiet space to work in. But what you get in return for giving them a bit of extra care and accommodation is glorious, undistorted, nuanced sound, with clear reproduction of both low and high frequencies. Unless they’re from a live concert performance, the top songs on your playlist were likely all recorded on condenser mics. Museums keep them in their collections. Abbey Road wouldn’t be Abbey Road without them.
Of course, what makes condenser mics so great for studio-based music production might make them a poorer choice for other things, such as podcasts, streaming and video meetings. As you speak, listeners may hear every lip smack and each hay-fevered sniff. And unless your room is properly soundproofed, ambient noise and echoes will accompany your speech like unwanted backup singers.
Our pick for best condenser mic, then, is mainly directed at singers or musicians with properly-soundproofed spaces. If you’re an ASMR creator, you’ll also want to pay attention, since the sensitivity of a condenser mic can be perfect for capturing even the quietest sounds with amazing clarity.
And now, the RØDE NT1-A. Unlike the Yeti and MV7, this microphone has been around for quite a while; in fact, it’s been a fixture of many studios for decades. And whereas the other mics reviewed feature an array of touch controls, dials, buttons, and lights, the NT1-A is a model of solid, metallic simplicity. Straight out of the box it feels ready to get to work.
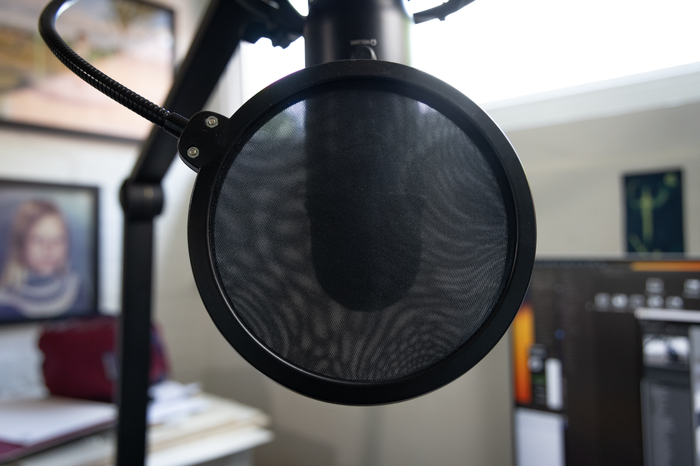
As a condenser mic, the NT1-A requires phantom power, so you’ll need an XLR cable and an audio interface. You’ll also want a good mounting solution - the cardioid polar pattern collects sound from the front and sides, and should be positioned about four to six inches away, with the metal dot on the side facing you as you speak, sing, play or handle your ASMR materials. Finally, we suggest getting a pop filter, not only to help deal with plosives, but with sibilance - those s, z, and sh consonant sounds that can make a microphone sound harsh.
Once you’ve connected it to power, mounted it, and dialled in the gain on the audio interface, the NT1-A will give you crisp, bright sound reproduction, with amazing detail. It’s not the most high-end microphone out there, but for its price - £150 for the mic, shock mount, pop filter and XLR cable - you get great performance paired with better durability than many condensers (we don’t recommend dropping it, but at least your blood pressure won’t be rising whenever someone goes near it). Price tag, professional sound and peace of mind - it's these three things that make the RØDE NT1-A our top pick in the condenser category.
Software CPR
Of course, there will always be an unpredictable element to video. Even the most professional sound and video teams make mistakes, and the most carefully rehearsed videos can still require multiple takes to get right. We recommend that you try to get the best audio possible straight into the microphone, but in cases where this isn't possible, there are a few software options that can help overcome challenging conditions or rescue audio that's not quite up to your standards.
The first is noise cancellation. If you work from home, especially with children or pets, we don't need to tell you about unplanned interruptions. A knock at the door can send pets into fits of hysterical barking, a sibling squabble can escalate into a pitched battle, and a quiet street can suddenly snarl into a hullabaloo of honking. For these cases, we're happy to say that noise cancelling is here to help. One good option is called Krisp, and it uses some nifty AI to improve voice clarity, eliminating echoes and masking background noise in real-time with its algorithms.
From a noise cancellation standpoint, the results are pretty good. There are some entertaining reviews out there, and after putting it through its paces, we can say that it's fairly easy to use and offers a solid step up from the the noise suppression options on Zoom and other meeting platforms (these are often activated by default, and if you're using Krisp or other specialist noise cancellation, we recommend that you turn them off in Settings). It's important to note, however, that any software solution that targets certain unwanted sound and frequencies will almost inevitably affect the quality of the sound you do want, and that relying wholly on software solutions rather than paying attention to your space and optimising your microphone will only get you so far. While Krisp was effective at blocking out background noise when we activated it, it also changed the sound quality of the user's voice, especially when the frequencies it was cancelling were similar in range to the speaker's voice.
For this reason, it's a software solution we'd recommend mainly for online meetings at times when a lot of background noise is truly unavoidable. You needn't have it on all of the time - if you're using Camo, you can simply turn on noise cancellation when needed, just by selecting Krisp from the device list in Camo Studio. Krisp is available for download on both Mac and Windows, and the free version allows you to use its basic background noise, voice and echo cancellation for up to 60 minutes a day.
For audio first aid after a video has already been recorded, we're big fans of Descript's Studio Sound. Whether there's just a hint of residual reverb, or a background noise that we didn't notice while recording, running the video through Studio Sound will typically be enough to iron out the wrinkles and leave us with a final product we can be proud of. You can use it for free on any video file up to 10 minutes long, and then decide for yourself if you'd like to spring for unlimited video length along with the full suite of Descript features.
And there you have it. From softening your space to selecting and setting up a microphone to repairing or boosting your audio with software - you now have all the skills you need to create video that sounds as good as it looks. Just don't forget to turn off Mute, and when you can, let us know what you've been doing to improve your audio. We'll be revisiting this guide as we try out additional microphones and software, so if there anything else you'd like us to test or try out, we are definitely all ears.
