How to get the best lighting on video calls


So, you want better lights for your video calls? We do, too. Over the past, we've tried out numerous different lighting options to see what works best when we're using Camo. What we've learned is that you can get some fantastic results without a professional production budget.
Unlike finding the best mount for your iPhone, which is fairly straightforward, achieving good lighting is slightly more complicated, and involves learning a little theory. For help with this, we reached out to professional photographer Gia Goodrich to talk about the qualities that make a good light.That's Gia giving an overview in the video below.
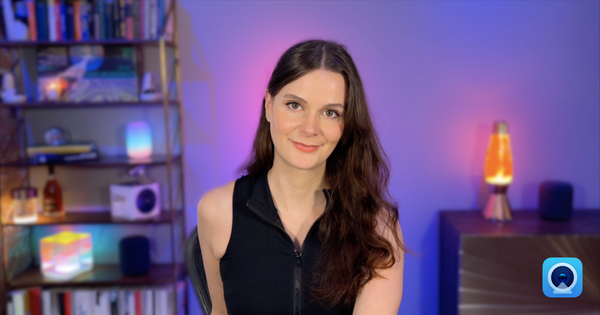
Beyond this, the sort of features you want to look for in a light depend on the purpose of the light. For something like a video call, you might want to incorporate multiple lights, as we do in our smart bulb video below. If you look at Gia's setup in her video, her three zones of lights are (1) the light that's lighting her (the key light), (2) the light that's adding a purpley-lilac hue to her background, (the fill light), and (3) the buttery yellow light of the lamp and strip light (the back light).
In this article, we'll mainly focus on finding a good key light (the light that will shine on the subject, for video calls, that's you). The background in many these illustrative images is therefore pretty dark, and in need of additional lighting to really complete the scene. Here's some more information from Gia about fill lights.
We asked Gia lots of other questions, so we'll continue to include the helpful context and explanations that she provided throughout the article. For more tips on creating a good lighting setup, Gia has an extremely helpful YouTube channel dedicated to helping video users and creators of all skill levels create good lighting setups, particularly for video-call specific issues, such as preventing glare from lighting when wearing glasses.
With Gia’s comments in mind, we have a fairly good starting point to begin to evaluate each of these lights. Practically speaking, of course, how well a light source works is just one piece of the puzzle when looking for a light that will work well for video calls, especially if you work from home. A good light in this situation needs to meet other, more practical criteria too.
To evaluate these lights we'll be asking the following questions:
-
How well does it work as a light source? Does the colour look natural and daylight balanced? Or is it wash the subject out or give too much warmth? Is the lighting soft or harsh? Is it intense enough?
-
Is it practical to use? Is it easy to set up and turn on and off for someone seated at a desk? How is controlled and powered? Do I need to charge it? Can it overheat? Is it loud? Is it too bright?
-
Does it work with one's space? Is it too big to fit practically into a home office? Are there too many cables? Can I position the light perfectly? Can I move it easily?
-
Is it cost-effective? If it’s expensive, is it justifiably so, or are there cheaper alternatives that produce a similar effect? If it’s budget-friendly, is it likely to last for a while, or will I need to replace it need replacement quickly?
We'll give each light a score of 5 for each section.
Products tested
Setup
Here’s where we'll be testing most of the different lighting options:


As you can see in these images, there are windows behind and to the right of the desk. To the right, you can see how the feed in Camo looks with this setup and no additional lighting.
There’s a lot of light in the room itself, but the position of the two windows is far from ideal. The light from behind causes the subject to appear darker than the background, and the light to the side, while the light from the side creates unwanted shadows on her face.
The first step, therefore, is to control as much of this light as possible. One option would be to simply work with the light by turning the desk to face face one of the windows. That would be a good source of light on this day and at this time, but we're looking for something that will give us the same good results at any time of day or year. We also need to compare these options from the same starting point, which is tough to do with natural light. So, let’s see what these lights can do on their own.


Softbox
| Scores: Softbox | |
|---|---|
| Light | 5 |
| Practicality | 4 |
| Space | 1 |
| Cost effective | 4 |
Products Used


Softboxes are used for professional sets, and offer the best (and most flattering) light of all the options I tested because of their size. The camera inside the softbox is actually quite small, but the two layers of diffusion within the box create a large, soft light that is big enough to gently wrap around whatever’s in the foreground.

We positioned the softbox directly behind and above our camera, and then angled it down to try to create a subtle Paramount lighting effect. Parker Walbeck outlines the five most popular portrait lighting patterns in his video here.


The light produced by the softbox is truly beautiful. It’s soft and flattering, and very bright without causing the subject discomfort. The colour on this one couldn't be adjusted, but it's set to a good daylight temperature, neither too warm nor too cool. The brightness can be adjusted, and we set ours at 75% brightness.
There's some assembly required, but if you're familiar with the general structure of umbrellas you'll be fine. Once it's set up, you just turn it on and off using a switch at the back of the light, and it remembers your last settings. It plugs into the mains, but because it’s made to be used on professional shoots, the lighting controls are at the back, so you can’t adjust the brightness from your desk. The light has a fan to prevent overheating, but it's barely loud enough to hear, and not loud enough to get picked up on most mics.
Is it a practical option? Probably not for most of us. This is a truly enormous piece of kit. Most desks sit flush against a wall, so, save for somehow mounting a light to the ceiling and moving back from your desk for calls, it’s not something you could use easily. But if you have the space, and want the best lighting available to you, this is it.
The softbox we used is made up of three sections: the light, the box and the stand, which, added together, cost about $300 (£220). It’s expensive for a video conferencing light, but for those who need the best light, it’s not overpriced.
USB video lights
| Scores: USB video light | |
|---|---|
| Light | 3 |
| Practicality | 5 |
| Space | 5 |
| Cost effective | 5 |
Products Used

The light came in a pack of two, although I’m only using one here. You can connect the light to your computer via USB cable with a small set of controls that let you turn the light on and off and adjust the brightness. It’s a simple light, but the light itself looks pretty natural, and it’s really easy to use from your desk. The stand is extendable, and can be lifted pretty high up, which is handy.


While the light comes with a softening filter, the filter is so close to the light source that it’s not softening the light as effectively as the softbox. You can see that in the image above where there is increased shine on my forehead, as well as shadows that small light sources often produce. The harsh light is also picking up some imperfections in the skin.
Some other cons: the cable isn’t super long, and it’s a bit cheaply made.
That said, for an option that costs $45 (£32) for two lights, it’s a pretty good option. It’s bright, the colour of the light is good, it’s compact, adjustable and easy to use.
Elgato key light
| Scores: Elgato key light | |
|---|---|
| Light | 3 |
| Practicality | 3 |
| Space | 4 |
| Cost effective | 2 |
Products Used
-
Elgato key light air $130
-
Elgato key light $190

Next up, I tried the streamer favourite, the Elgato key lights. While the quality of the stand itself is much better than the generic light tested above, the quality of the light is quite similar. The Elgato light has the same issue as the generic light tested, which is that, while it makes an effort to soften the light, as the diffusing section is so close to the light bulbs that the light is inevitably harsher than light from a softbox.


We didn’t enjoy the Elgato software experience, and had hoped that for the price it would work with HomeKit, which it doesn’t. Software issues seem to be compounded when trying to switch between the two lights, which is why the larger light appears warmer in the shots (we might have fixed this with some time spent googling and trying various things, but it seemed like a bit of a slog). From a practical perspective, the much less sophisticated generic light with controls on the cable worked better. That said, the concept of being able to adjust the light level and temperature from your monitor is a good one.
The small and large Elgato lights retail for just over $100 (£100) and just under $200 (£200) respectively. We're unsure why the slightly larger version is almost twice the price, as it doesn't seem to perform too differently.
Other things we didn't love: the cable isn’t very long, the stand is really quite clunky and hard to move around, particularly as it’s designed to be used behind monitors.
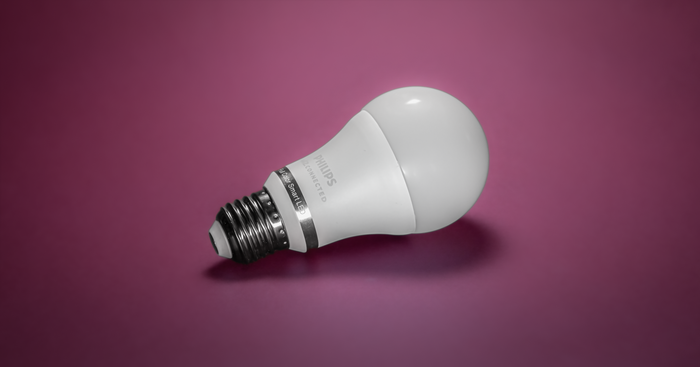
Smart LED bulbs
| Scores: Smart LED bulbs | |
|---|---|
| Light | 4 |
| Practicality | 4 |
| Space | 5 |
| Cost effective | 5 |
Products Used
- Philips Smart LED 8W Bulbs £11.99 each
What if you really don’t want to buy any more things?
A while back, we tested a basic swing-arm lamp and garden-variety light bulb to see how it stacked up against the more professional options here. The answer: not so great, though it was a bit better than the Kodak ring light we also tested for this guide. Since then, however, we’ve tested a number of different setups using household lamps we already had, and found that we could achieve some fantastic results using just three programmable smart LED bulbs. Here’s how we pulled it off.
The fact that this lighting setup cost far less than most of the other alternatives here, while also being the easiest to set up and control, places these bulbs high up on our list of lighting recommendations. Their lumen stats might not be as impressive as the professional lighting we tested, but if positioned close enough to the subject, they gave off all that was needed to get a crisp, clear image from a good webcam, phone, or mirrorless camera (none of them were at full power in the video).
Perhaps the only thing that keeps this option from running away completely with the top prize is that Homekit-compatible versions are about three times pricier, and the fact that not everybody may have as many lamps around as were found in our test office. The lamps used in the video were all purchased from eBay, but if you don't have time to go auction stalking, you can achieve the same result with a couple of inexpensive tasks lamps and a glowy table lamp. Building this whole setup from scratch - three smart bulbs and three lamps - will cost a total of £79 in the UK, $100 in the US.
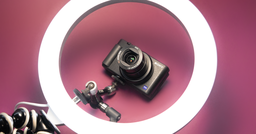
Kodak ring light
| Scores: Kodak ring light | |
|---|---|
| Light | 2 |
| Practicality | 2 |
| Space | 2 |
| Cost effective | 1 |
Products Used
- Kodak ring light $130

Ring lights seem to have somehow garnered a reputation as the perfect light to use with your phone and on video calls, to the extent that, if you walk around a city like London and look through windows (if you’re the sort of person who does that), you’re about as likely to see a ring light as a bowl of fruit.
Generally speaking, though, ring lights just practically aren’t that great. Here’s Gia explaining why:
We tried out a Kodak ring light that was one of the more expensive options here. It came in a case that included a phone mount that seemed promising for cutting down the amount of desk space required.


This was definitely the worst light I tested. The light just wasn’t strong enough, and while you can switch between three pre-set light colours, even the ‘neutral’ option seemed a little too warm. You can see that the image from our Camo feed isn’t as crisp as most of the other options, as the light simply isn’t throwing enough light on the scene.
From a practical standpoint, this light is infuriating. While the phone mount means you don’t need a separate mount for your phone, the legs refuse to do anything other than splay out, taking up a large amount of desk space.
The stand doesn’t extend very high, which isn’t too bad when you’re using it with a laptop, but using it with a larger monitor would cut off half of the light.
Verdict
| Final scores | |
|---|---|
| Softbox | 14 |
| USB video lights | 18 |
| Elgato key lights | 12 |
| Wi-Fi Smart LED bulbs | 18 |
| Kodak ring light | 7 |
For smaller spaces and budgets, both the USB and smart bulbs were great options. If you have two or more lamps in your workspace, we highly recommend outfitting them with smart bulbs, placing them in key and fill positions, and setting them to daylight temperature and complementary brightness levels when you're going to be on video. If your space is less lamp-friendly, using a pair of USB-powered LEDs will improve your lighting for video calls, and take up minimal real estate in your space. Both of these options can be turned off and on and adjusted easily from a desk.
Additional lights
Products Used
Though we've stayed mostly with key lights here, we had few other lights hanging around that we thought we might try as fill lights. Here's a quick and dirty look at using other lights in your scene to create a more interesting lighting setup for video calls.
Once you've got your key light figured out, you can more on to look at adding more layers of light.
While our scene is okay, it's a bit boring. There's also the issue that the subject's orangish hair isn't too distinct from the orangish bricks, and there's a lot of cream colour in the shot. To balance this, we used some Hue Play lights and a strip light to add more orange to the bricks, and placed a pink light almost directly behind the subject to gave just a bit of pink to her left hand side. As we noted earlier, LED bulbs like the Hue are really easy to control and adjust from your phone, and we set up this scene in a couple of minutes.

With a bit more time, you could think a little more critically about where you might want to place lights, and why. Ideally, each layer of light you add should serve some sort of purpose, for example, you might want to create more of a distinction between yourself and the background (as Gia did in her videos by using a contrasting colour behind her), add some visual interest to your scene, or take away shadows from your face and under your chin.
If you'd like us to look at any other lights, or if you've got any other tips to help me get a better lighting setup, let uk know in the comments below (or Tweet us @reincubate)


by Frank Kafka
Great article, but next time use a regular person for the photos and not a supermodel.
reply by: Reincubate Support
Scarlet says thank you!