Zo krijg je de beste verlichting bij videogesprekken
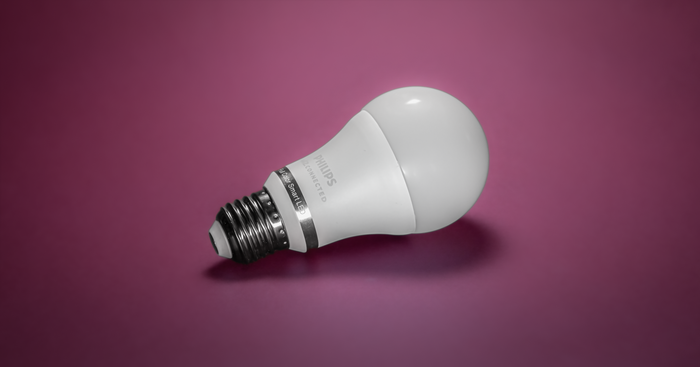
Dus, u wilt betere verlichting voor uw videogesprekken? Wij ook. In het verleden hebben we talloze verschillende verlichtingsopties uitgeprobeerd om te zien wat het beste werkt als we Camo gebruiken. Wat we hebben geleerd, is dat u fantastische resultaten kunt behalen zonder een professioneel productiebudget.
In tegenstelling tot het vinden van de beste houder voor je iPhone , wat vrij eenvoudig is, is het bereiken van goede belichting iets ingewikkelder en vereist het een beetje theorie. Voor hulp hierbij hebben we contact opgenomen met professioneel fotograaf Gia Goodrich om te praten over de kwaliteiten die een goede belichting maken. Dat is Gia die een overzicht geeft in de onderstaande video.
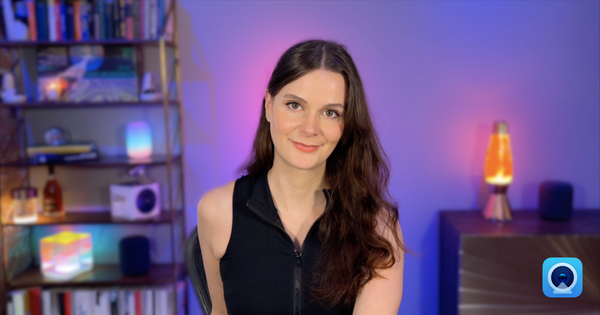
Daarnaast hangt het soort functies waar je naar op zoek wilt in een lamp af van het doel van de lamp. Voor iets als een videogesprek, wil je misschien meerdere lampen opnemen, zoals we doen in onze video over de slimme lamp hieronder. Als je kijkt naar Gia's opstelling in haar video, dan zijn haar drie zones met lampen (1) het licht dat haar verlicht (het hoofdlicht), (2) het licht dat een paars-lila tint toevoegt aan haar achtergrond (het opvullicht) en (3) het botergele licht van de lamp en de stripverlichting (het achtergrondlicht).
In dit artikel richten we ons vooral op het vinden van een goede key light (het licht dat op het onderwerp schijnt, voor videogesprekken, dat ben jij). De achtergrond in veel van deze illustratieve afbeeldingen is daarom vrij donker en heeft extra verlichting nodig om de scène echt compleet te maken. Hier is wat meer informatie van Gia over fill lights.
We hebben Gia nog veel meer vragen gesteld, dus we blijven de nuttige context en uitleg die ze in het hele artikel gaf, opnemen. Voor meer tips over het maken van een goede lichtopstelling heeft Gia een uiterst nuttig YouTube-kanaal dat is gewijd aan het helpen van videogebruikers en makers van alle niveaus om goede lichtopstellingen te maken, met name voor specifieke problemen met videogesprekken, zoals het voorkomen van schittering van verlichting bij het dragen van een bril .
Met Gia's opmerkingen in gedachten hebben we een redelijk goed startpunt om elk van deze lampen te evalueren. Praktisch gezien is hoe goed een lichtbron werkt natuurlijk maar één stukje van de puzzel als je op zoek bent naar een lamp die goed werkt voor videogesprekken, vooral als je thuis werkt. Een goede lamp in deze situatie moet ook aan andere, meer praktische criteria voldoen.
Om deze lampen te evalueren, stellen we de volgende vragen:
Hoe goed werkt het als lichtbron? Ziet de kleur er natuurlijk en daglichtgebalanceerd uit? Of vervaagt het het onderwerp of geeft het te veel warmte? Is de belichting zacht of hard? Is het intens genoeg?
Is het praktisch in gebruik? Is het makkelijk in te stellen en aan en uit te zetten voor iemand die achter een bureau zit? Hoe wordt het aangestuurd en van stroom voorzien? Moet ik het opladen? Kan het oververhit raken? Is het luid? Is het te fel?
Past het bij de ruimte? Is het te groot om praktisch in een thuiskantoor te passen? Zijn er te veel kabels? Kan ik het licht perfect positioneren? Kan ik het gemakkelijk verplaatsen?
Is het kosteneffectief? Als het duur is, is dat dan terecht, of zijn er goedkopere alternatieven die een vergelijkbaar effect hebben? Als het budgetvriendelijk is, gaat het dan waarschijnlijk een tijdje mee, of moet ik het snel vervangen?
We geven elk licht een score van 5 voor elk onderdeel.
Producten getest
- Zachte doos
- USB-videolampen
- Elgato sleutellampje
- Slimme LED-lampen
- Kodak ringlicht
- Philips hue play-lampen
Opstelling
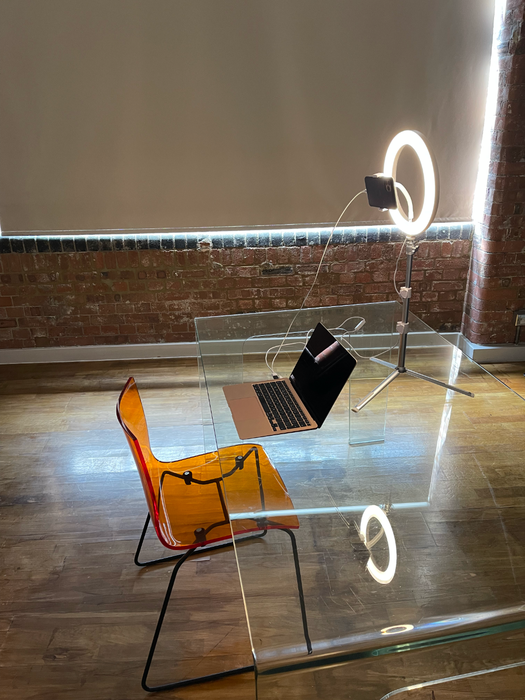
Hier gaan we de meeste verschillende verlichtingsopties testen:
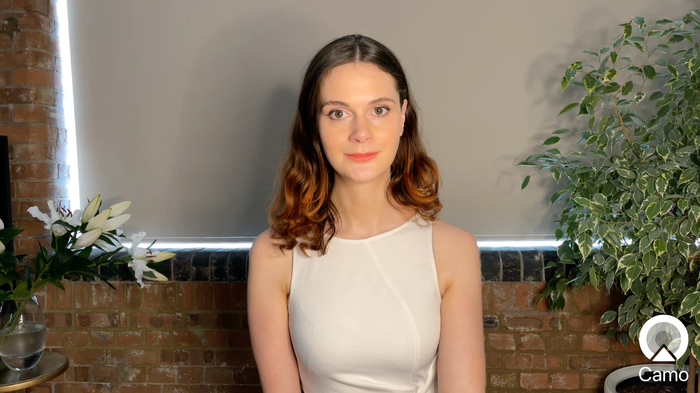
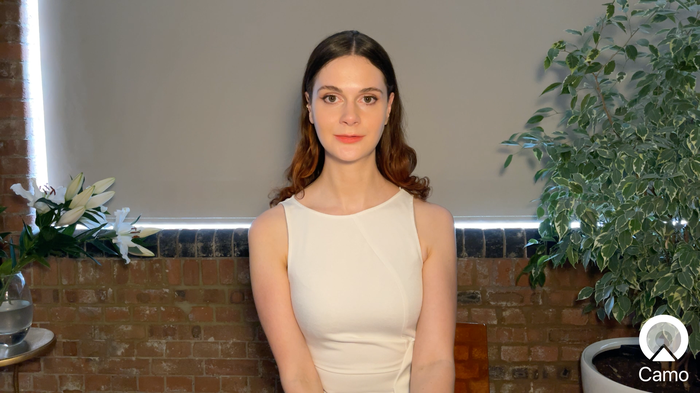
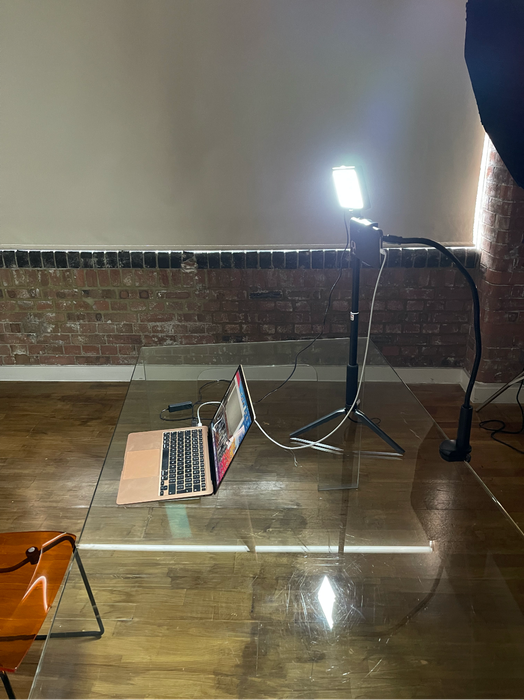
Zoals u op deze afbeeldingen kunt zien, zijn er ramen achter en rechts van het bureau. Rechts ziet u hoe de feed in Camo eruitziet met deze opstelling en zonder extra verlichting.
Er is veel licht in de kamer zelf, maar de positie van de twee ramen is verre van ideaal. Het licht van achteren zorgt ervoor dat het onderwerp donkerder lijkt dan de achtergrond, en het licht van opzij, terwijl het licht van opzij ongewenste schaduwen op haar gezicht creëert.
De eerste stap is daarom om zoveel mogelijk van dit licht te controleren. Een optie zou zijn om gewoon met het licht te werken door het bureau naar een van de ramen te draaien. Dat zou een goede lichtbron zijn op deze dag en op dit tijdstip, maar we zijn op zoek naar iets dat ons op elk moment van de dag of het jaar dezelfde goede resultaten geeft. We moeten deze opties ook vergelijken vanuit hetzelfde startpunt, wat lastig is met natuurlijk licht. Laten we dus eens kijken wat deze lampen op zichzelf kunnen doen.
Softbox
| Scores: Softbox | |
|---|---|
| Licht | 5 |
| praktisch | 4 |
| Ruimte | 1 |
| Kostenefficiënt | 4 |
Gebruikte producten
Softboxen worden gebruikt voor professionele sets en bieden vanwege hun formaat het beste (en meest flatteuze) licht van alle opties die ik heb getest. De camera in de softbox is eigenlijk vrij klein, maar de twee diffusielagen in de box creëren een groot, zacht licht dat groot genoeg is om zachtjes om wat er zich op de voorgrond bevindt te wikkelen.
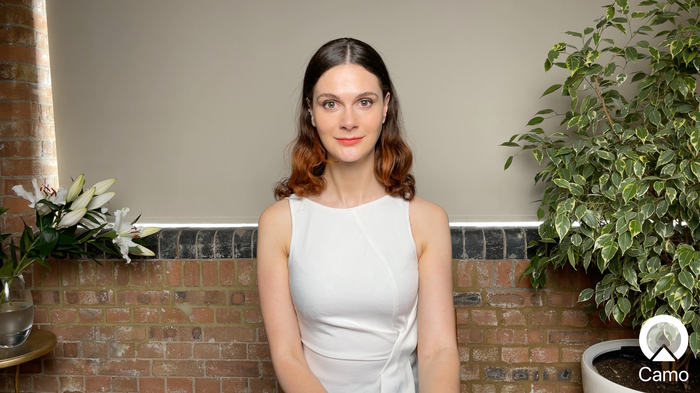
We plaatsten de softbox direct achter en boven onze camera en richtten hem vervolgens naar beneden om te proberen een subtiel Paramount-lichteffect te creëren. Parker Walbeck schetst de vijf populairste portretbelichtingspatronen in zijn video hier.
Het licht dat de softbox produceert is werkelijk prachtig. Het is zacht en flatterend, en erg helder zonder dat het onderwerp er last van heeft. De kleur van deze kon niet worden aangepast, maar hij is ingesteld op een goede daglichttemperatuur, niet te warm en niet te koud. De helderheid kan worden aangepast, en wij hebben de onze ingesteld op 75% helderheid.
Er is wat montage vereist, maar als je bekend bent met de algemene structuur van paraplu's, dan is het prima. Zodra het is ingesteld, zet je het gewoon aan en uit met een schakelaar aan de achterkant van de lamp, en het onthoudt je laatste instellingen. Het wordt aangesloten op het lichtnet, maar omdat het is gemaakt voor professionele opnames, zitten de lichtregelaars aan de achterkant, dus je kunt de helderheid niet vanaf je bureau aanpassen. De lamp heeft een ventilator om oververhitting te voorkomen, maar het is nauwelijks luid genoeg om te horen, en niet luid genoeg om door de meeste microfoons te worden opgepikt.
Is het een praktische optie? Waarschijnlijk niet voor de meesten van ons. Dit is echt een enorm stuk gereedschap. De meeste bureaus staan strak tegen een muur, dus behalve als je op de een of andere manier een lamp aan het plafond bevestigt en een stapje terug doet van je bureau om te bellen, is het niet iets dat je zomaar kunt gebruiken. Maar als je de ruimte hebt en de beste verlichting wilt die er is, dan is dit het.
De softbox die we gebruikten bestaat uit drie delen: het licht, de box en de standaard, die samen ongeveer $300 (£220) kosten. Het is duur voor een videoconferentielamp, maar voor degenen die het beste licht nodig hebben, is het niet te duur.
USB-videolampen
| Scores: USB-videolamp | |
|---|---|
| Licht | 3 |
| praktisch | 5 |
| Ruimte | 5 |
| Kostenefficiënt | 5 |
Gebruikte producten
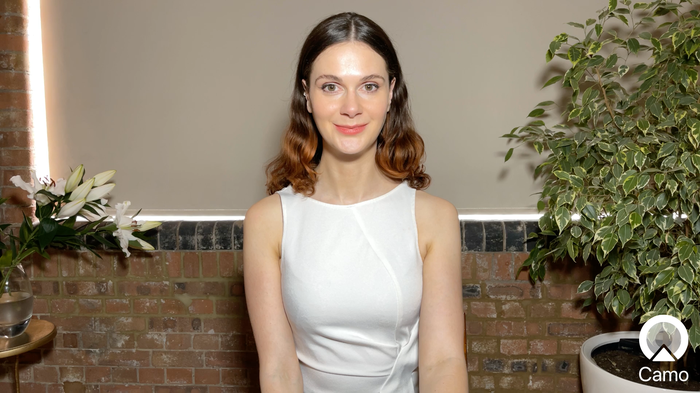
Het licht kwam in een verpakking van twee , hoewel ik er hier maar één gebruik. Je kunt de lamp via een USB-kabel op je computer aansluiten met een kleine set bedieningselementen waarmee je de lamp aan en uit kunt zetten en de helderheid kunt aanpassen. Het is een eenvoudige lamp, maar de lamp zelf ziet er vrij natuurlijk uit en is heel gemakkelijk te gebruiken vanaf je bureau. De standaard is uitschuifbaar en kan behoorlijk hoog worden getild, wat handig is.
Hoewel het licht een verzachtend filter heeft, zit het filter zo dicht bij de lichtbron dat het het licht niet zo effectief verzacht als de softbox. Dat zie je op de afbeelding hierboven, waar ik meer glans op mijn voorhoofd heb, en schaduwen die kleine lichtbronnen vaak produceren. Het harde licht pikt ook wat oneffenheden in de huid op.
Enkele andere nadelen: de kabel is niet super lang en hij is een beetje goedkoop gemaakt.
Dat gezegd hebbende, voor een optie die $ 45 (£ 32) kost voor twee lampen, is het een redelijk goede optie. Hij is helder, de kleur van het licht is goed, hij is compact, verstelbaar en gebruiksvriendelijk.
Elgato sleutellampje
| Scores: Elgato toetslicht | |
|---|---|
| Licht | 3 |
| praktisch | 3 |
| Ruimte | 4 |
| Kostenefficiënt | 2 |
Gebruikte producten
Elgato sleutellicht $190
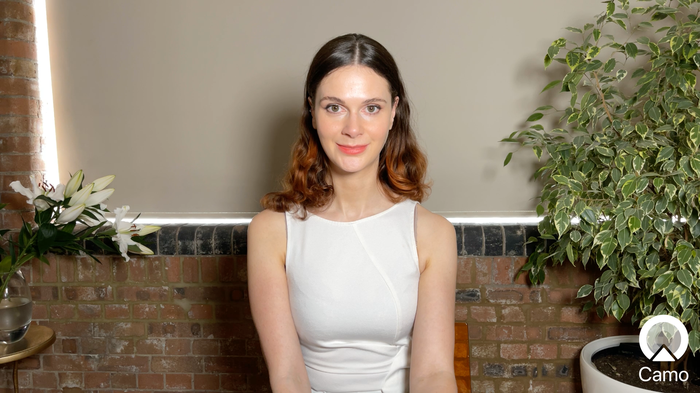
Vervolgens probeerde ik de streamerfavoriet, de Elgato key lights . Hoewel de kwaliteit van de standaard zelf veel beter is dan de generieke lamp die hierboven is getest, is de kwaliteit van de lamp vrijwel gelijk. De Elgato-lamp heeft hetzelfde probleem als de generieke lamp die is getest, namelijk dat, hoewel het een poging doet om het licht te verzachten, het diffusiegedeelte zo dicht bij de lampen zit dat het licht onvermijdelijk harder is dan licht van een softbox.
We vonden de Elgato software-ervaring niet prettig en hadden gehoopt dat het voor de prijs zou werken met HomeKit, wat niet het geval is. Softwareproblemen lijken erger te worden als je probeert te schakelen tussen de twee lampen, waardoor de grotere lamp warmer lijkt op de foto's (we hadden dit misschien kunnen oplossen door wat tijd te besteden aan googelen en het proberen van verschillende dingen, maar het leek een beetje een sleur). Vanuit een praktisch perspectief werkte de veel minder geavanceerde generieke lamp met bedieningselementen op de kabel beter. Dat gezegd hebbende, het concept om het lichtniveau en de temperatuur vanaf je monitor te kunnen aanpassen is een goed idee.
De kleine en grote Elgato-lampen worden verkocht voor respectievelijk iets meer dan $ 100 (£ 100) en iets minder dan $ 200 (£ 200). We weten niet zeker waarom de iets grotere versie bijna twee keer zo duur is, aangezien deze niet heel anders lijkt te presteren.
Andere dingen die we niet leuk vonden: de kabel is niet erg lang, de standaard is nogal onhandig en lastig te verplaatsen, vooral omdat hij ontworpen is om achter monitoren te gebruiken.
Slimme LED-lampen
| Scores: Slimme LED-lampen | |
|---|---|
| Licht | 4 |
| Praktisch | 4 |
| Ruimte | 5 |
| Kosteneffectief | 5 |
Gebruikte producten
- Philips Smart LED 8W-lampen £ 11,99 per stuk
Wat als je echt niets meer wilt kopen?
Een tijdje geleden hebben we een eenvoudige swing-arm lamp en een gewone gloeilamp getest om te zien hoe deze zich verhield tot de meer professionele opties hier. Het antwoord: niet zo geweldig, hoewel het iets beter was dan de Kodak ringlamp die we ook voor deze gids hebben getest. Sindsdien hebben we echter een aantal verschillende opstellingen getest met huishoudelijke lampen die we al hadden, en we kwamen erachter dat we fantastische resultaten konden behalen met slechts drie programmeerbare slimme LED-lampen. Hier is hoe we het voor elkaar kregen.
Het feit dat deze verlichtingsopstelling veel minder kost dan de meeste andere alternatieven hier, en ook het makkelijkst is om te installeren en te bedienen, plaatst deze lampen hoog op onze lijst met verlichtingsaanbevelingen. Hun lumenstatistieken zijn misschien niet zo indrukwekkend als de professionele verlichting die we hebben getest, maar als ze dicht genoeg bij het onderwerp worden geplaatst, geven ze alles wat nodig is om een helder, duidelijk beeld te krijgen van een goede webcam, telefoon of spiegelloze camera (geen van hen was op volle kracht in de video).
Misschien is het enige dat deze optie ervan weerhoudt om er helemaal met de hoofdprijs vandoor te gaan, dat Homekit-compatibele versies ongeveer drie keer zo duur zijn, en het feit dat niet iedereen zoveel lampen in huis heeft als in ons testkantoor. De lampen die in de video worden gebruikt, zijn allemaal gekocht op eBay, maar als je geen tijd hebt om te gaan veilen, kun je hetzelfde resultaat bereiken met een paar goedkope taaklampen en een gloeiende tafellamp . Het bouwen van deze hele opstelling vanaf nul - drie slimme lampen en drie lampen - kost in het VK in totaal £ 79, in de VS $ 100.
Kodak-ringlicht
| Scores: Kodak ringlicht | |
|---|---|
| Licht | 2 |
| praktisch | 2 |
| Ruimte | 2 |
| Kostenefficiënt | 1 |
Gebruikte producten
- Kodak ringlicht $130
Ringlichten lijken op de een of andere manier een reputatie te hebben opgebouwd als het perfecte licht om te gebruiken met je telefoon en voor videogesprekken, in die mate dat, als je door een stad als Londen loopt en door ramen kijkt (als je het soort persoon bent dat doet), heb je ongeveer net zoveel kans om een ringlicht te zien als een schaal met fruit.
Over het algemeen zijn ringlichten echter praktisch niet zo geweldig. Hier is Gia die uitlegt waarom:
We probeerden een Kodak ringlamp uit, een van de duurdere opties hier. Hij werd geleverd in een hoesje met een telefoonhouder die veelbelovend leek om de benodigde bureauruimte te verkleinen.
Dit was absoluut het slechtste licht dat ik heb getest. Het licht was gewoon niet sterk genoeg en hoewel je kunt schakelen tussen drie vooraf ingestelde lichtkleuren, leek zelfs de optie 'neutraal' een beetje te warm. Je kunt zien dat de afbeelding van onze Camo-feed niet zo scherp is als de meeste andere opties, omdat het licht gewoon niet genoeg licht op de scène werpt.
Vanuit praktisch oogpunt is dit licht razend. Terwijl de telefoonhouder betekent dat je geen aparte houder voor je telefoon nodig hebt, weigeren de poten iets anders te doen dan uit te spreiden en nemen ze veel bureauruimte in beslag.
De standaard steekt niet erg hoog uit, wat niet zo erg is als je hem met een laptop gebruikt, maar als je hem met een grotere monitor gebruikt, zou de helft van het licht wegvallen.
Vonnis
| Eindscore | |
|---|---|
| Zachte doos | 14 |
| USB-videolampen | 18 |
| Elgato sleutellampjes | 12 |
| Wi-Fi Smart LED-lampen | 18 |
| Kodak ringlicht | 7 |
Voor kleinere ruimtes en budgetten waren zowel de USB- als de slimme lampen geweldige opties. Als u twee of meer lampen in uw werkruimte hebt, raden we u ten zeerste aan om ze uit te rusten met slimme lampen, ze in de belangrijkste en vulposities te plaatsen en ze in te stellen op daglichttemperatuur en complementaire helderheidsniveaus wanneer u video's gaat kijken. Als uw ruimte minder lampvriendelijk is, verbetert het gebruik van een paar USB-aangedreven LED's uw verlichting voor videogesprekken en neemt het minimale ruimte in beslag in uw ruimte. Beide opties kunnen eenvoudig worden in- en uitgeschakeld en aangepast vanaf een bureau.
Extra verlichting
Gebruikte producten
Hue speelt $ 150 voor 2
Tintstrip $ 80
Hoewel we hier voornamelijk bij de hoofdlichten zijn gebleven, hadden we nog een paar andere lichten die we als opvullichten wilden proberen. Hier is een snelle en vuile blik op het gebruik van andere lichten in je scène om een interessantere belichtingsopstelling te creëren voor videogesprekken.
Als je eenmaal je belangrijkste licht hebt bedacht, kun je meer kijken naar het toevoegen van meer lichtlagen.
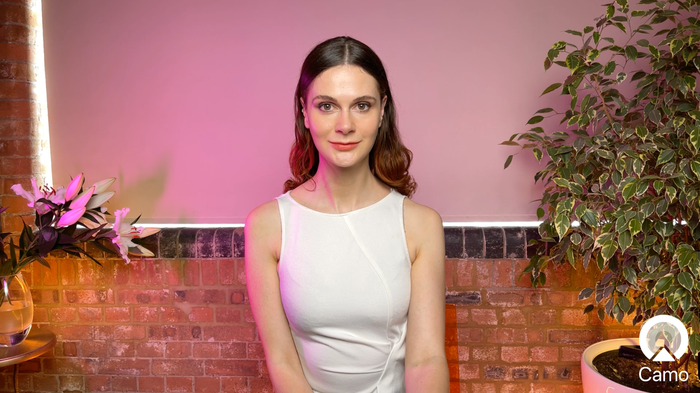
Hoewel onze scène oké is, is hij een beetje saai. Er is ook het probleem dat het oranje haar van het onderwerp niet zo goed te onderscheiden is van de oranje stenen, en er zit veel crèmekleur in de opname. Om dit in evenwicht te brengen, gebruikten we wat Hue Play-lampen en een striplicht om meer oranje aan de stenen toe te voegen, en plaatsten we een roze licht bijna direct achter het onderwerp om haar linkerhand een beetje roze te geven. Zoals we eerder opmerkten, zijn ledlampen zoals de Hue heel gemakkelijk te bedienen en aan te passen vanaf je telefoon, en we hebben deze scène in een paar minuten ingesteld.
Met wat meer tijd zou je wat kritischer kunnen nadenken over waar je lichten wilt plaatsen en waarom. Idealiter zou elke laag licht die je toevoegt een bepaald doel moeten dienen, bijvoorbeeld, je zou meer onderscheid kunnen maken tussen jezelf en de achtergrond (zoals Gia deed in haar video's door een contrasterende kleur achter haar te gebruiken), wat visuele interesse toevoegen aan je scène of schaduwen van je gezicht en onder je kin weghalen.
Als je wilt dat we naar andere lampen kijken, of als je andere tips hebt om mij te helpen een betere lichtopstelling te krijgen, laat het ons dan weten in de reacties hieronder (of stuur ons een tweet via @reincubate )









door Frank Kafka
Great article, but next time use a regular person for the photos and not a supermodel.
antwoord door: Reincubate Support
Scarlet says thank you!