Comment obtenir le meilleur éclairage lors des appels vidéo


Vous souhaitez donc de meilleurs éclairages pour vos appels vidéo ? Nous aussi. Au cours des dernières années, nous avons essayé de nombreuses options d'éclairage différentes pour voir ce qui fonctionne le mieux lorsque nous utilisons Camo. Ce que nous avons appris, c'est que vous pouvez obtenir des résultats fantastiques sans budget de production professionnel.
Contrairement à la recherche du meilleur support pour votre iPhone , qui est assez simple, obtenir un bon éclairage est un peu plus compliqué et nécessite d'apprendre un peu de théorie. Pour nous aider, nous avons contacté la photographe professionnelle Gia Goodrich pour parler des qualités qui font une bonne lumière. C'est Gia qui donne un aperçu dans la vidéo ci-dessous.
Au-delà de cela, le type de fonctionnalités que vous souhaitez rechercher dans une lumière dépend de l'objectif de la lumière. Pour quelque chose comme un appel vidéo, vous souhaiterez peut-être intégrer plusieurs lumières, comme nous le faisons dans notre vidéo sur les ampoules intelligentes ci-dessous. Si vous regardez la configuration de Gia dans sa vidéo, ses trois zones de lumière sont (1) la lumière qui l'éclaire (la lumière principale), (2) la lumière qui ajoute une teinte violet-lilas à son arrière-plan (la lumière de remplissage) et (3) la lumière jaune beurre de la lampe et de la bande lumineuse (le rétroéclairage).
Dans cet article, nous allons principalement nous concentrer sur la recherche d'une bonne lumière principale (la lumière qui éclairera le sujet, pour les appels vidéo, c'est-à-dire vous). L'arrière-plan de la plupart de ces images illustratives est donc assez sombre et nécessite un éclairage supplémentaire pour vraiment compléter la scène. Voici quelques informations supplémentaires de Gia sur les lumières de remplissage.
Nous avons posé de nombreuses autres questions à Gia, nous continuerons donc à inclure le contexte et les explications utiles qu'elle a fournis tout au long de l'article. Pour plus de conseils sur la création d'une bonne configuration d'éclairage, Gia dispose d'une chaîne YouTube extrêmement utile dédiée à aider les utilisateurs et les créateurs de vidéos de tous niveaux à créer de bonnes configurations d'éclairage, en particulier pour les problèmes spécifiques aux appels vidéo, comme la prévention de l'éblouissement dû à l'éclairage lorsque vous portez des lunettes .
En gardant à l'esprit les commentaires de Gia, nous disposons d'un assez bon point de départ pour commencer à évaluer chacune de ces lumières. En pratique, bien sûr, le bon fonctionnement d'une source lumineuse n'est qu'un élément du puzzle lorsque vous recherchez une lumière qui fonctionnera bien pour les appels vidéo, surtout si vous travaillez à domicile. Une bonne lumière dans cette situation doit également répondre à d'autres critères plus pratiques.
Pour évaluer ces lumières, nous poserons les questions suivantes :
Est -ce que la lumière est efficace ? La couleur est-elle naturelle et équilibrée par rapport à la lumière du jour ? Ou est-ce que la lumière est trop douce ou trop chaude ? L'éclairage est-il doux ou dur ? Est-il suffisamment intense ?
Est-il pratique à utiliser ? Est-il facile à installer et à allumer et à éteindre pour une personne assise à un bureau ? Comment est-il contrôlé et alimenté ? Dois-je le charger ? Peut-il surchauffer ? Est-il bruyant ? Est-il trop lumineux ?
Est-ce que la lampe s'adapte à l'espace de travail ? Est-elle trop grande pour s'intégrer dans un bureau à domicile ? Y a-t-il trop de câbles ? Puis-je positionner la lampe parfaitement ? Puis-je la déplacer facilement ?
Est-ce rentable ? Si c'est cher, est-ce justifié ou existe-t-il des alternatives moins chères qui produisent un effet similaire ? Si c'est économique, est-ce que ça va durer un certain temps ou est-ce que je devrai le remplacer rapidement ?
Nous attribuerons à chaque lumière une note de 5 pour chaque section.
Produits testés
- Boîte à lumière
- Lampes vidéo USB
- Touche lumineuse Elgato
- Ampoules LED intelligentes
- Anneau lumineux Kodak
- Lampes de jeu Phillips Hue
Installer
C'est ici que nous testerons la plupart des différentes options d'éclairage :


Comme vous pouvez le voir sur ces images, il y a des fenêtres derrière et à droite du bureau. À droite, vous pouvez voir à quoi ressemble le flux dans Camo avec cette configuration et sans éclairage supplémentaire.
La pièce est très lumineuse, mais la position des deux fenêtres est loin d'être idéale. La lumière de derrière fait paraître le sujet plus sombre que l'arrière-plan, et la lumière de côté, tandis que la lumière de côté crée des ombres indésirables sur son visage.
La première étape consiste donc à contrôler autant que possible cette lumière. Une option serait de travailler simplement avec la lumière en tournant le bureau pour faire face à l'une des fenêtres. Cela serait une bonne source de lumière ce jour-là et à cette heure-ci, mais nous recherchons quelque chose qui nous donnera les mêmes bons résultats à tout moment de la journée ou de l'année. Nous devons également comparer ces options à partir du même point de départ, ce qui est difficile à faire avec la lumière naturelle. Voyons donc ce que ces lumières peuvent faire par elles-mêmes.


Boîte à lumière
| Partitions : Softbox | |
|---|---|
| Lumière | 5 |
| Praticité | 4 |
| Espace | 1 |
| Rentable | 4 |
Produits utilisés


Les boîtes à lumière sont utilisées pour les décors professionnels et offrent la meilleure lumière (et la plus flatteuse) de toutes les options que j'ai testées en raison de leur taille. La caméra à l'intérieur de la boîte à lumière est en fait assez petite, mais les deux couches de diffusion à l'intérieur de la boîte créent une grande lumière douce qui est assez grande pour envelopper doucement tout ce qui se trouve au premier plan.

Nous avons positionné la softbox directement derrière et au-dessus de notre appareil photo, puis l'avons inclinée vers le bas pour essayer de créer un effet d'éclairage Paramount subtil. Parker Walbeck décrit les cinq modèles d'éclairage de portrait les plus populaires dans sa vidéo ici.


La lumière produite par la softbox est vraiment belle. Elle est douce et flatteuse, et très lumineuse sans gêner le sujet. La couleur de celle-ci n'a pas pu être réglée, mais elle est réglée sur une bonne température de lumière du jour, ni trop chaude ni trop froide. La luminosité est réglable, et nous avons réglé la nôtre à 75 % de luminosité.
Il faut un peu d'assemblage, mais si vous connaissez la structure générale des parapluies, tout ira bien. Une fois installé, il suffit de l'allumer et de l'éteindre à l'aide d'un interrupteur à l'arrière de la lampe, et elle mémorise vos derniers réglages. Elle se branche sur le secteur, mais comme elle est conçue pour être utilisée sur des tournages professionnels, les commandes d'éclairage se trouvent à l'arrière, vous ne pouvez donc pas régler la luminosité depuis votre bureau. La lampe est équipée d'un ventilateur pour éviter la surchauffe, mais elle est à peine assez forte pour être entendue et pas assez forte pour être captée par la plupart des micros.
Est-ce une option pratique ? Probablement pas pour la plupart d'entre nous. C'est un équipement vraiment énorme. La plupart des bureaux sont placés contre un mur, donc, à part monter une lumière au plafond et vous éloigner de votre bureau pour les appels, ce n'est pas quelque chose que vous pourriez utiliser facilement. Mais si vous avez l'espace et que vous voulez le meilleur éclairage disponible, c'est ce qu'il vous faut.
La softbox que nous avons utilisée est composée de trois parties : la lumière, la boîte et le support, qui, mis ensemble, coûtent environ 300 $ (220 £). C'est cher pour une lumière de visioconférence, mais pour ceux qui ont besoin de la meilleure lumière, ce n'est pas trop cher.
Lumières vidéo USB
| Partitions : lampe vidéo USB | |
|---|---|
| Lumière | 3 |
| Praticité | 5 |
| Espace | 5 |
| Rentable | 5 |
Produits utilisés

La lumière est venue dans un paquet de deux , bien que je n'en utilise qu'un ici. Vous pouvez connecter la lumière à votre ordinateur via un câble USB avec un petit ensemble de commandes qui vous permettent d'allumer et d'éteindre la lumière et de régler la luminosité. C'est une lumière simple, mais la lumière elle-même a l'air assez naturelle et elle est vraiment facile à utiliser depuis votre bureau. Le support est extensible et peut être soulevé assez haut, ce qui est pratique.


Bien que la lampe soit équipée d'un filtre adoucissant, celui-ci est si proche de la source lumineuse qu'il n'adoucit pas la lumière aussi efficacement que la softbox. Vous pouvez le constater sur l'image ci-dessus, où la brillance est accrue sur mon front, ainsi que les ombres que produisent souvent les petites sources lumineuses. La lumière intense fait également ressortir certaines imperfections de la peau.
Quelques autres inconvénients : le câble n'est pas très long, et c'est un peu bon marché.
Cela dit, pour une option qui coûte 45 $ (32 £) pour deux lumières, c'est une très bonne option. C'est lumineux, la couleur de la lumière est bonne, c'est compact, réglable et facile à utiliser.
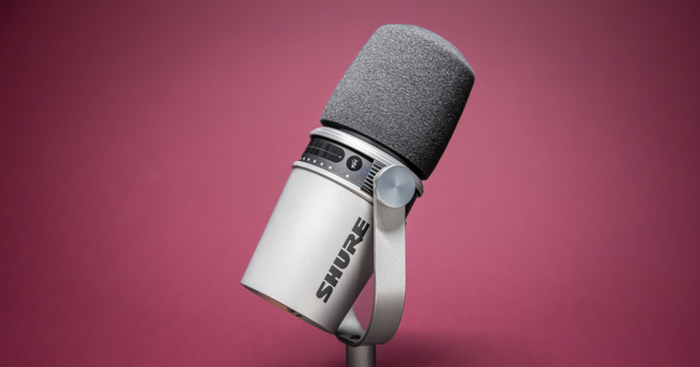
Lampe de touche Elgato
| Scores : touche lumineuse Elgato | |
|---|---|
| Lumière | 3 |
| Praticité | 3 |
| Espace | 4 |
| Rentable | 2 |
Produits utilisés
Elgato key light air $130
Lampe à clé Elgato 190 $

Ensuite, j'ai essayé le favori des streamers, les lampes à clé Elgato . Bien que la qualité du support lui-même soit bien meilleure que celle de la lampe générique testée ci-dessus, la qualité de la lumière est assez similaire. La lampe Elgato a le même problème que la lampe générique testée, à savoir que, bien qu'elle fasse un effort pour adoucir la lumière, la section de diffusion est si proche des ampoules que la lumière est inévitablement plus dure que la lumière d'une softbox.


Nous n'avons pas apprécié l'expérience logicielle d'Elgato et nous avions espéré que pour le prix, il fonctionnerait avec HomeKit, ce qui n'est pas le cas. Les problèmes logiciels semblent être aggravés lorsque l'on essaie de basculer entre les deux lumières, ce qui explique pourquoi la plus grande lumière apparaît plus chaude sur les photos (nous aurions pu résoudre ce problème en passant un peu de temps à chercher sur Google et à essayer diverses choses, mais cela semblait être un peu fastidieux). D'un point de vue pratique, la lumière générique beaucoup moins sophistiquée avec des commandes sur le câble fonctionnait mieux. Cela dit, le concept de pouvoir régler le niveau de lumière et la température à partir de votre moniteur est une bonne idée.
Les petites et grandes lampes Elgato sont vendues respectivement à un peu plus de 100 $ (100 £) et à un peu moins de 200 $ (200 £). Nous ne savons pas pourquoi la version légèrement plus grande coûte presque le double du prix, car elle ne semble pas avoir de performances très différentes.
Autres choses que nous n'avons pas aimées : le câble n'est pas très long, le support est vraiment assez encombrant et difficile à déplacer, d'autant plus qu'il est conçu pour être utilisé derrière des moniteurs.
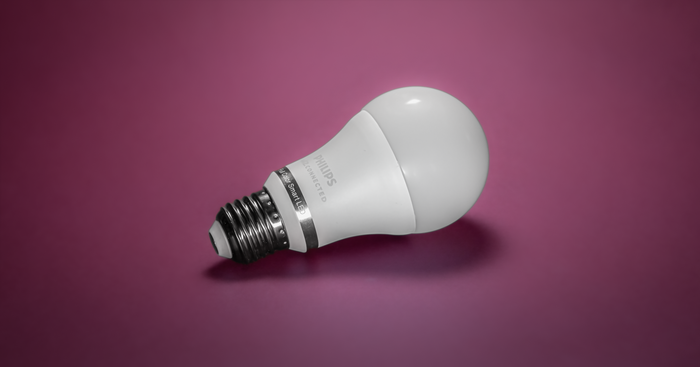
Ampoules LED intelligentes
| Notes : Ampoules LED intelligentes | |
|---|---|
| Lumière | 4 |
| Praticité | 4 |
| Espace | 5 |
| Rentable | 5 |
Produits utilisés
- Ampoules LED intelligentes Philips 8 W 11,99 £ chacune
Et si vous ne voulez vraiment plus acheter de choses ?
Il y a quelque temps, nous avons testé une lampe à bras pivotant basique et une ampoule de jardin pour voir comment elle se comparait aux options plus professionnelles présentées ici. La réponse : pas terrible, même si c'était un peu mieux que la lampe annulaire Kodak que nous avons également testée pour ce guide. Depuis lors, cependant, nous avons testé un certain nombre de configurations différentes en utilisant des lampes domestiques que nous avions déjà, et nous avons découvert que nous pouvions obtenir des résultats fantastiques en utilisant seulement trois ampoules LED intelligentes programmables. Voici comment nous y sommes parvenus.
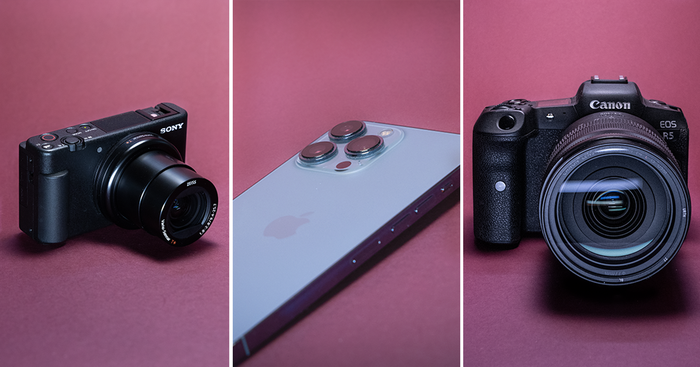
Le fait que cette configuration d’éclairage coûte bien moins cher que la plupart des autres alternatives présentées ici, tout en étant la plus simple à installer et à contrôler, place ces ampoules en tête de notre liste de recommandations d’éclairage. Leurs statistiques en lumens ne sont peut-être pas aussi impressionnantes que l’éclairage professionnel que nous avons testé, mais si elles étaient placées suffisamment près du sujet, elles dégageaient tout ce qui était nécessaire pour obtenir une image nette et claire à partir d’une bonne webcam, d’un téléphone ou d’un appareil photo sans miroir (aucun d’entre eux n’était à pleine puissance dans la vidéo).
La seule chose qui empêche cette option de remporter complètement la palme est peut-être le fait que les versions compatibles Homekit sont environ trois fois plus chères et que tout le monde n'a pas forcément autant de lampes que celles que nous avons trouvées dans notre bureau de test. Les lampes utilisées dans la vidéo ont toutes été achetées sur eBay, mais si vous n'avez pas le temps de faire des enchères, vous pouvez obtenir le même résultat avec quelques lampes de travail bon marché et une lampe de table lumineuse. Construire toute cette configuration à partir de zéro - trois ampoules intelligentes et trois lampes - coûtera au total 79 £ au Royaume-Uni, 100 $ aux États-Unis.
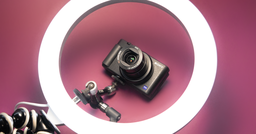
Anneau lumineux Kodak
| Scores : Anneau lumineux Kodak | |
|---|---|
| Lumière | 2 |
| Praticité | 2 |
| Espace | 2 |
| Rentable | 1 |
Produits utilisés
- Lampe annulaire Kodak 130 $

Les anneaux lumineux semblent avoir acquis la réputation d'être l'éclairage parfait à utiliser avec votre téléphone et lors d'appels vidéo, dans la mesure où, si vous vous promenez dans une ville comme Londres et regardez à travers les fenêtres (si vous êtes le genre de personne qui fait cela), vous êtes à peu près aussi susceptible de voir un anneau lumineux qu'un bol de fruits.
De manière générale, cependant, les lumières annulaires ne sont pratiquement pas si bonnes. Voici Gia expliquant pourquoi :
Nous avons testé un anneau lumineux Kodak, l'une des options les plus chères de la gamme. Il était livré dans un étui comprenant un support de téléphone qui semblait prometteur pour réduire l'espace de bureau requis.


C'était sans aucun doute la pire lumière que j'ai testée. La lumière n'était tout simplement pas assez forte et, même si vous pouvez basculer entre trois couleurs de lumière prédéfinies, même l'option « neutre » semblait un peu trop chaude. Vous pouvez voir que l'image de notre flux Camo n'est pas aussi nette que la plupart des autres options, car la lumière n'éclaire tout simplement pas suffisamment la scène.
D'un point de vue pratique, cette lumière est exaspérante. Alors que le support de téléphone signifie que vous n'avez pas besoin d'un support séparé pour votre téléphone, les pieds refusent de faire autre chose que de s'évaser, occupant une grande quantité d'espace sur le bureau.
Le support ne s'étend pas très haut, ce qui n'est pas trop grave lorsque vous l'utilisez avec un ordinateur portable, mais l'utiliser avec un moniteur plus grand couperait la moitié de la lumière.
Verdict
| Résultats finaux | |
|---|---|
| Boîte à lumière | 14 |
| Lampes vidéo USB | 18 |
| Touches lumineuses Elgato | 12 |
| Ampoules LED intelligentes Wi-Fi | 18 |
| Anneau lumineux Kodak | 7 |
Pour les petits espaces et les petits budgets, les ampoules USB et intelligentes sont toutes deux d'excellentes options. Si vous avez deux lampes ou plus dans votre espace de travail, nous vous recommandons vivement de les équiper d'ampoules intelligentes, de les placer dans des positions clés et de remplissage, et de les régler sur la température de la lumière du jour et les niveaux de luminosité complémentaires lorsque vous allez être en vidéo. Si votre espace est moins adapté aux lampes, l'utilisation d'une paire de LED alimentées par USB améliorera votre éclairage pour les appels vidéo et occupera un minimum d'espace dans votre espace. Ces deux options peuvent être éteintes et allumées et réglées facilement depuis un bureau.
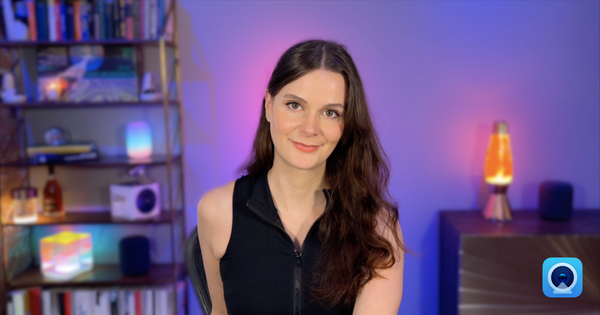
Lumières supplémentaires
Produits utilisés
Hue joue 150 $ pour 2
Bande de teinte 80 $
Bien que nous ayons principalement utilisé des lumières principales ici, nous avions quelques autres lumières qui traînaient et que nous pensions pouvoir essayer comme lumières de remplissage. Voici un aperçu rapide et concis de l'utilisation d'autres lumières dans votre scène pour créer une configuration d'éclairage plus intéressante pour les appels vidéo.
Une fois que vous avez compris votre lumière principale, vous pouvez continuer à ajouter plus de couches de lumière.
Bien que notre scène soit correcte, elle est un peu ennuyeuse. Il y a aussi le problème que les cheveux orange du sujet ne se distinguent pas trop des briques orange, et il y a beaucoup de couleur crème dans la prise de vue. Pour équilibrer cela, nous avons utilisé des lumières Hue Play et une bande lumineuse pour ajouter plus d'orange aux briques, et avons placé une lumière rose presque directement derrière le sujet pour donner juste un peu de rose à son côté gauche. Comme nous l'avons noté plus tôt, les ampoules LED comme Hue sont vraiment faciles à contrôler et à régler depuis votre téléphone, et nous avons mis en place cette scène en quelques minutes.

Avec un peu plus de temps, vous pourrez réfléchir de manière plus critique à l'endroit où vous souhaitez placer les lumières et pourquoi. Idéalement, chaque couche de lumière que vous ajoutez doit avoir une fonction particulière. Par exemple, vous pouvez créer une distinction plus marquée entre vous et l'arrière-plan (comme Gia l'a fait dans ses vidéos en utilisant une couleur contrastante derrière elle), ajouter un intérêt visuel à votre scène ou supprimer les ombres de votre visage et sous votre menton.
Si vous souhaitez que nous examinions d'autres lumières, ou si vous avez d'autres conseils pour m'aider à obtenir une meilleure configuration d'éclairage, faites-le nous savoir dans les commentaires ci-dessous (ou tweetez-nous @reincubate )


par Frank Kafka
Great article, but next time use a regular person for the photos and not a supermodel.
répondre par: Reincubate Support
Scarlet says thank you!