화상 통화에서 최상의 조명을 얻는 방법


그럼, 화상 통화에 더 나은 조명을 원하시나요? 저희도 그렇습니다. 과거에 저희는 Camo를 사용할 때 어떤 조명이 가장 효과적인지 알아보기 위해 다양한 조명 옵션을 시도해 보았습니다. 저희가 알게 된 것은 전문적인 제작 예산 없이도 환상적인 결과를 얻을 수 있다는 것입니다.
iPhone에 가장 적합한 마운트를 찾는 것과 달리, 비교적 간단한 반면, 좋은 조명을 얻는 것은 약간 더 복잡하며 약간의 이론을 배우는 것을 포함합니다. 이에 대한 도움을 위해, 우리는 전문 사진작가 Gia Goodrich 에게 연락하여 좋은 조명을 만드는 특성에 대해 이야기했습니다. 아래 비디오에서 Gia가 개요를 설명합니다.
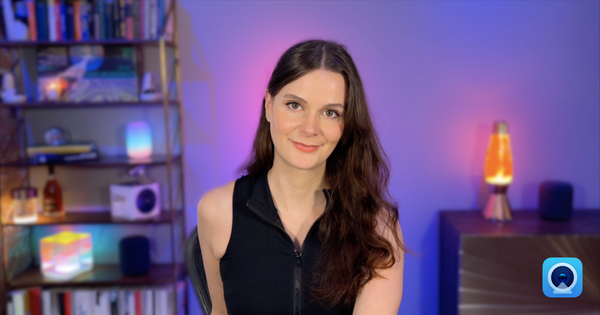
이 외에도 조명에서 찾고자 하는 특징의 종류는 조명의 목적에 따라 달라집니다. 화상 통화와 같은 경우 아래의 스마트 전구 비디오에서처럼 여러 개의 조명을 통합하고 싶을 수 있습니다. 비디오에서 Gia의 설정을 살펴보면 세 개의 조명 구역은 (1) 그녀를 비추는 조명(키 조명), (2) 그녀의 배경에 보라색-라일락 색조를 더하는 조명(필 조명), (3) 램프와 스트립 조명의 버터 같은 노란색 조명(백라이트)입니다.
이 글에서는 주로 좋은 키 라이트(화상 통화에서 피사체에 비출 빛, 즉 여러분)를 찾는 데 집중할 것입니다. 따라서 이러한 설명 이미지의 배경은 매우 어둡고 장면을 완성하기 위해 추가 조명이 필요합니다. Gia가 제공하는 필 라이트에 대한 추가 정보는 다음과 같습니다.
우리는 Gia에게 다른 많은 질문을 했기 때문에, 그녀가 기사 전반에 걸쳐 제공한 유용한 맥락과 설명을 계속 포함할 것입니다. 좋은 조명 설정을 만드는 방법에 대한 더 많은 팁을 위해, Gia는 모든 기술 수준의 비디오 사용자와 제작자가 좋은 조명 설정을 만드는 데 도움을 주는 매우 유용한 YouTube 채널을 가지고 있습니다. 특히 안경을 착용했을 때 조명으로 인한 눈부심을 방지하는 것과 같은 화상 통화 특정 문제에 대해 말입니다.
Gia의 의견을 염두에 두고, 우리는 이러한 조명 각각을 평가하기 시작할 수 있는 상당히 좋은 출발점을 가지고 있습니다. 물론, 실제적으로, 광원이 얼마나 잘 작동하는지는 특히 재택근무를 하는 경우 화상 통화에 적합한 조명을 찾을 때 퍼즐의 한 조각일 뿐입니다. 이 상황에서 좋은 조명은 다른 더 실용적인 기준도 충족해야 합니다.
이러한 조명을 평가하기 위해 다음과 같은 질문을 던져보겠습니다.
광원으로 얼마나 잘 작동합니까? 색상이 자연스럽고 일광과 균형이 맞습니까? 아니면 피사체를 씻어내거나 너무 많은 따뜻함을 제공합니까? 조명이 부드럽거나 거칠습니까? 충분히 강렬합니까?
사용하기에 실용적인가요? 책상에 앉은 사람이 쉽게 설정하고 켜고 끌 수 있나요? 어떻게 제어하고 전원을 공급하나요? 충전해야 하나요? 과열될 수 있나요? 시끄러워요? 너무 밝나요?
공간에 맞나요? 홈 오피스에 실제로 들어가기에는 너무 크나요? 케이블이 너무 많나요? 조명을 완벽하게 배치할 수 있나요? 쉽게 옮길 수 있나요?
비용 효율적입니까? 비싸다면 그럴 만한 이유가 있습니까? 아니면 비슷한 효과를 내는 더 저렴한 대안이 있습니까? 예산에 맞다면 오래 지속될 가능성이 있습니까? 아니면 빨리 교체해야 합니까?
각 섹션별로 각 조명에 5점을 주겠습니다.
테스트 된 제품
설정
여기서는 다양한 조명 옵션을 가장 많이 테스트할 예정입니다.


이 이미지에서 볼 수 있듯이, 책상 뒤와 오른쪽에 창문이 있습니다. 오른쪽에서 Camo 피드가 이 설정과 추가 조명 없이 어떻게 보이는지 볼 수 있습니다.
방 자체에는 빛이 많이 들어오지만, 두 창문의 위치는 이상적이지 않습니다. 뒤에서 들어오는 빛은 피사체를 배경보다 어둡게 보이게 하고, 옆에서 들어오는 빛은 피사체의 얼굴에 원치 않는 그림자를 만듭니다.
따라서 첫 번째 단계는 가능한 한 많은 빛을 제어하는 것입니다. 한 가지 옵션은 책상을 창문 중 하나를 마주보도록 돌려서 빛으로 작업하는 것입니다. 그것은 오늘과 이 시간에 좋은 빛의 원천이 될 것이지만, 우리는 하루 중 어느 때나 일년 중 어느 때나 동일한 좋은 결과를 줄 무언가를 찾고 있습니다. 또한 자연광으로는 하기 힘든 동일한 시작점에서 이러한 옵션을 비교해야 합니다. 그럼, 이 조명이 그 자체로 무엇을 할 수 있는지 살펴보겠습니다.


소프트 박스
| 점수 : 소프트 박스 | |
|---|---|
| 빛 | 5 |
| 실용적인 사항 | 4 |
| 우주 | 1 |
| 비용 효과적 | 4 |
사용 된 제품
Neewer 헤비 듀티 라이트 스탠드 $ 70


소프트 박스는 전문가 용 세트에 사용되며 크기 때문에 테스트 한 모든 옵션 중 가장 좋은 (그리고 가장 아첨하는) 조명을 제공합니다. 소프트 박스 내부의 카메라는 실제로는 매우 작지만 상자 내부의 두 확산 레이어는 전경에있는 모든 것을 부드럽게 감싸기에 충분한 크고 부드러운 빛을 만듭니다.

우리는 소프트박스를 카메라 바로 뒤와 위에 배치한 다음 각도를 낮추어 미묘한 파라마운트 조명 효과를 만들어보았습니다. Parker Walbeck은 여기 비디오에서 가장 인기 있는 5가지 인물 조명 패턴을 설명합니다.


소프트박스에서 나오는 빛은 정말 아름답습니다. 부드럽고 매력적이며 피사체에게 불편함을 주지 않으면서도 매우 밝습니다. 이 사진의 색상은 조정할 수 없지만 너무 따뜻하지도 차갑지도 않은 적절한 일광 온도로 설정되어 있습니다. 밝기를 조정할 수 있으며, 우리는 밝기를 75%로 설정했습니다.
조립이 필요하지만, 엄브렐라의 일반적인 구조에 익숙하다면 괜찮을 겁니다. 설치가 끝나면 조명 뒤쪽의 스위치를 사용하여 켜고 끄기만 하면 되고, 마지막 설정을 기억합니다. 전원에 꽂으면 되지만, 전문 촬영에 사용하도록 만들어졌기 때문에 조명 조절 장치가 뒤쪽에 있어 책상에서 밝기를 조절할 수 없습니다. 조명에는 과열을 방지하기 위한 팬이 있지만, 거의 들리지 않을 정도로 소리가 크고, 대부분 마이크에 잡힐 정도로 크지 않습니다.
실용적인 옵션일까요? 아마 우리 대부분에게는 그렇지 않을 겁니다. 이건 정말 엄청난 장비입니다. 대부분 책상은 벽에 딱 붙어 있기 때문에 천장에 조명을 설치하고 전화를 걸 때 책상에서 뒤로 물러서는 것을 제외하면 쉽게 사용할 수 있는 것은 아닙니다. 하지만 공간이 있고 사용 가능한 최고의 조명을 원한다면 이게 바로 그것입니다.
우리가 사용한 소프트박스는 조명, 박스, 스탠드의 세 부분으로 구성되어 있으며, 이를 합치면 약 300달러(220파운드)가 듭니다. 화상 회의 조명으로는 비싼 편이지만, 최고의 조명이 필요한 사람들에게는 비싼 편은 아닙니다.
USB 비디오 조명
| 점수 : USB 비디오 라이트 | |
|---|---|
| 빛 | 삼 |
| 실용적인 사항 | 5 |
| 우주 | 5 |
| 비용 효과적 | 5 |
사용 된 제품

조명은 2 개 팩으로 나왔지만 여기서는 하나만 사용하고 있습니다. 조명을 켜고 끄고 밝기를 조정할 수있는 작은 컨트롤 세트가있는 USB 케이블을 통해 조명을 컴퓨터에 연결할 수 있습니다. 단순한 조명이지만 조명 자체가 매우 자연스럽고 책상에서 사용하기가 정말 쉽습니다. 스탠드는 확장 할 수 있으며 꽤 높이 들어 올릴 수있어 편리합니다.


빛에는 소프트닝 필터가 있지만, 필터가 광원에 너무 가까워서 소프트박스만큼 효과적으로 빛을 부드럽게 하지 못합니다. 위의 이미지에서 이마에 빛이 더 많이 비치고 작은 광원이 종종 만들어내는 그림자가 보입니다. 강한 빛은 피부의 일부 결점도 잡아냅니다.
다른 단점 : 케이블이 너무 길지 않고 약간 저렴하게 만들어졌습니다.
즉, 조명 2 개에 $ 45 (£ 32)가 드는 옵션의 경우 꽤 좋은 옵션입니다. 밝고 빛의 색상이 좋고 컴팩트하고 조절 가능하며 사용하기 쉽습니다.
Elgato 키 라이트
| 점수 : Elgato 키 라이트 | |
|---|---|
| 빛 | 삼 |
| 실용적인 사항 | 삼 |
| 우주 | 4 |
| 비용 효과적 | 2 |
사용 된 제품
엘가 토 키 라이트 에어 $ 130
엘가 토 키 라이트 $ 190

다음으로, 스트리머의 인기 제품인 Elgato 키 라이트를 시도했습니다. 스탠드 자체의 품질은 위에서 테스트한 일반 라이트보다 훨씬 좋지만, 라이트의 품질은 꽤 비슷합니다. Elgato 라이트는 테스트한 일반 라이트와 동일한 문제가 있는데, 빛을 부드럽게 하려고 노력하지만 확산 섹션이 전구에 너무 가까워서 소프트박스의 빛보다 불가피하게 빛이 더 강하다는 것입니다.


우리는 Elgato 소프트웨어 경험을 즐기지 못했고, 가격 대비 HomeKit에서 작동하기를 바랐지만 그렇지 않았습니다. 두 조명 사이를 전환하려고 하면 소프트웨어 문제가 더 심해지는 듯해서, 더 큰 조명이 사진에서 더 따뜻하게 보입니다(시간을 들여 구글링하고 다양한 것을 시도하면 이 문제를 해결할 수 있었을지 모르지만, 좀 지루한 듯합니다). 실용적인 관점에서 케이블에 컨트롤이 있는 훨씬 덜 정교한 일반 조명이 더 잘 작동했습니다. 그렇긴 하지만 모니터에서 조명 레벨과 온도를 조정할 수 있다는 개념은 좋은 것입니다.
작은 Elgato 조명과 큰 Elgato 조명은 각각 100달러(100파운드)와 200달러(200파운드)에 약간 못 미치는 가격에 판매됩니다. 약간 더 큰 버전이 왜 가격이 거의 두 배인지는 잘 모르겠습니다. 성능이 크게 다르지 않은 것 같거든요.
우리가 좋아하지 않은 다른 점으로는 케이블이 그다지 길지 않고, 스탠드가 정말 둔중하고 움직이기 어렵다는 점이 있습니다. 특히 모니터 뒤에서 사용하도록 디자인된 것이 더욱 그렇습니다.
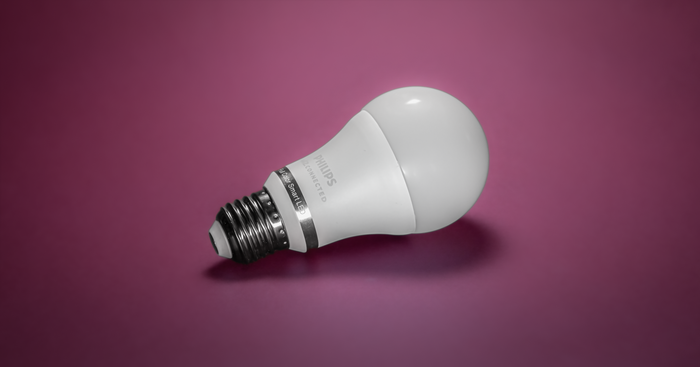
스마트 LED 전구
| 점수: 스마트 LED 전구 | |
|---|---|
| 빛 | 4 |
| 실용적인 사항 | 4 |
| 공간 | 5 |
| 비용 효율적 | 5 |
사용 된 제품
- Philips Smart LED 8W 전구 £11.99 각각
정말로 더 이상 물건을 사고 싶지 않다면?
얼마 전, 우리는 기본적인 스윙암 램프와 일반 전구를 테스트하여 여기의 보다 전문적인 옵션과 비교했습니다. 답은 그렇게 좋지는 않았지만, 이 가이드를 위해 테스트한 코닥 링 라이트보다 약간 나았습니다. 그러나 그 이후로 우리는 이미 가지고 있던 가정용 램프를 사용하여 여러 가지 다른 설정을 테스트했고, 프로그래밍 가능한 스마트 LED 전구 3개만 사용하여 환상적인 결과를 얻을 수 있다는 것을 알게 되었습니다. 우리가 어떻게 해냈는지 알려드리겠습니다.
이 조명 설정은 여기 다른 대안 대부분보다 훨씬 저렴하면서도 설정과 제어가 가장 쉬운데, 이 전구는 조명 추천 목록에서 높은 순위를 차지합니다. 루멘 수치는 테스트한 전문 조명만큼 인상적이지 않을 수 있지만 피사체에 충분히 가까이 배치하면 좋은 웹캠, 휴대전화 또는 미러리스 카메라에서 선명하고 깨끗한 이미지를 얻는 데 필요한 모든 것을 제공했습니다(비디오에서 모두 최대 전력으로 작동하지는 않았습니다).
아마도 이 옵션이 최고 상품으로 완전히 도망가지 못하게 하는 유일한 것은 Homekit 호환 버전 이 약 3배 더 비싸고, 모든 사람이 우리 테스트 사무실에서 발견한 것만큼 많은 램프를 가지고 있지 않을 수도 있다는 사실일 것입니다. 비디오에서 사용된 램프는 모두 eBay에서 구입했지만 경매를 추적할 시간이 없다면 저렴한 작업 램프 몇 개와 빛나는 테이블 램프 로 같은 결과를 얻을 수 있습니다. 이 전체 설정을 처음부터 만드는 것(스마트 전구 3개와 램프 3개)은 영국에서는 총 £79, 미국에서는 $100이 듭니다.
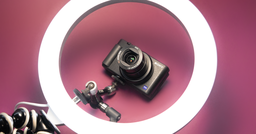
Kodak 링 라이트
| 점수 : Kodak 링 라이트 | |
|---|---|
| 빛 | 2 |
| 실용적인 사항 | 2 |
| 우주 | 2 |
| 비용 효과적 | 1 |
사용 된 제품
- Kodak 링 조명 $ 130

링 라이트는 전화기와 화상 통화에 사용하기에 완벽한 조명으로 명성을 얻은 것 같습니다. 런던과 같은 도시를 산책하고 창문을 통해 보면 그렇게하면 과일 한 그릇처럼 링 라이트를 볼 수 있습니다.
그러나 일반적으로 링 라이트는 실제로 그다지 좋지 않습니다. 이유를 설명하는 Gia는 다음과 같습니다.
우리는 여기서 가장 비싼 옵션 중 하나인 코닥 링 라이트를 시도했습니다. 그것은 책상 공간의 필요량을 줄이는 데 유망해 보이는 전화 마운트가 포함된 케이스에 들어 있었습니다.


이건 제가 테스트한 것 중 확실히 최악의 조명이었습니다. 조명이 충분히 강하지 않았고, 세 가지 사전 설정된 조명 색상 사이를 전환할 수 있지만 '중립' 옵션조차도 약간 너무 따뜻해 보였습니다. Camo 피드의 이미지가 다른 옵션 대부분만큼 선명하지 않은 것을 알 수 있는데, 조명이 장면에 충분한 조명을 비추지 않기 때문입니다.
실용적인 관점에서 볼 때이 빛은 격분합니다. 폰 마운트는 폰을위한 별도의 마운트가 필요하지 않다는 것을 의미하지만 다리는 넓게 펼쳐지는 것 이외의 다른 작업을 거부하여 많은 책상 공간을 차지합니다.
스탠드가 너무 높이 늘어나지 않아 노트북과 함께 사용할 때 나쁘지는 않지만 더 큰 모니터와 함께 사용하면 빛의 절반이 차단됩니다.
평결
| 최종 점수 | |
|---|---|
| 소프트박스 | 14 |
| USB 비디오 조명 | 18 |
| 엘가토 키 라이트 | 12 |
| Wi-Fi 스마트 LED 전구 | 18 |
| 코닥 링 라이트 | 7 |
더 작은 공간과 예산의 경우 USB와 스마트 전구는 모두 훌륭한 옵션이었습니다. 작업 공간에 램프가 두 개 이상 있는 경우 스마트 전구를 장착하고 키 및 필 위치에 배치하고 비디오를 촬영할 때 일광 온도와 보완 밝기 수준으로 설정하는 것이 좋습니다. 공간이 램프에 덜 친화적인 경우 USB 전원 LED 한 쌍을 사용하면 화상 통화 시 조명이 개선되고 공간에서 차지하는 공간이 최소화됩니다. 이 두 옵션 모두 책상에서 쉽게 끄고 켤 수 있으며 조정할 수 있습니다.
추가 조명
사용 된 제품
여기서는 주로 키 라이트를 사용했지만, 채우기 라이트로 시도해 볼 만한 다른 라이트도 몇 개 있었습니다. 여기서는 장면에서 다른 라이트를 사용하여 화상 통화를 위한 더욱 흥미로운 조명 설정을 만드는 방법에 대해 간단하고 간단하게 살펴보겠습니다.
키 라이트를 파악한 후에는 더 많은 라이트 레이어를 추가하는 방법을 살펴볼 수 있습니다.
우리의 장면은 괜찮지만, 약간 지루합니다. 또한 피사체의 주황색 머리카락이 주황색 벽돌과 크게 다르지 않고, 샷에 크림색이 많이 나온다는 문제도 있습니다. 이를 균형 잡기 위해 Hue Play 조명과 스트립 조명을 사용하여 벽돌에 주황색을 더 추가하고, 피사체의 거의 바로 뒤에 분홍색 조명을 배치하여 그녀의 왼쪽에 약간의 분홍색을 더했습니다. 앞서 언급했듯이 Hue와 같은 LED 전구는 휴대폰에서 제어하고 조정하기가 정말 쉽고, 몇 분 안에 이 장면을 설정했습니다.

시간이 조금 더 있다면 조명을 어디에 배치하고 싶은지, 그리고 그 이유를 조금 더 비판적으로 생각할 수 있습니다. 이상적으로는 추가하는 조명의 각 레이어가 어떤 종류의 목적을 가져야 합니다. 예를 들어, 자신과 배경 사이에 더 많은 구별을 만들고 싶을 수 있습니다(Gia가 비디오에서 그녀 뒤에 대조적인 색상을 사용하여 한 것처럼). 장면에 시각적 흥미를 더하거나 얼굴과 턱 아래의 그림자를 없애고 싶을 수 있습니다.
다른 조명을 살펴보길 원하시거나 더 나은 조명 설정을 위한 다른 팁이 있으시면 아래에 댓글로 알려주세요(또는 @reincubate 로 트윗해주세요)


으로 Frank Kafka
Great article, but next time use a regular person for the photos and not a supermodel.
답장하다: Reincubate Support
Scarlet says thank you!