How to download or transfer iPhone and iCloud Photos


What this guide will help you achieve
Difficulty: easy
Steps: up to 3
Time needed: 5 minutes
Back in 2008, we released iPhone Backup Extractor, the first tool of its kind for accessing and transferring iPhone data. This guide distils the experience we've built in transferring Photos from iOS, and lays out what we've learned in a series of easy to follow steps.
We're on a mission to help people get better access to their own data, and would love to help if you get stuck or need further help. Just drop us a note on live chat, or leave a comment below. ?
If you've got photos or videos on your iPhone and need to get them copied off, or if you want to download your iCloud photos, this guide will help. iPhone Backup Extractor is capable of transferring and downloading your photos, from any version of iOS or iCloud, and from all iPhone, iPads and iPods.
There are many places your iPhone, iPad or iPod may store photos. If you don't know which is most appropriate for you, it might make sense to try them all to get photos off your iPhone -- or to contact our support team.
- Transfer photos from iPhone to computer via an iTunes backup
- Download all photos from iCloud via an iCloud backup
- Download iCloud Photo Library to your PC or Mac
- Download Photo Stream
- Transfer pictures from iPhone to PC or Mac with USB
Let's start with the quickest way to transfer your iPhone's or iPad's photos to your computer!
Transfer photos from iPhone to computer via an iTunes backup
All of the pictures shown in your iPhone or iPad's "Camera Roll" can be transferred to your PC or Mac by using an iTunes backup. Creating a backup is free
-
Download and run iPhone Backup Extractor. It runs on PCs and Macs.
Choose your most recent backup from the backup browser on the left side of iPhone Backup Extractor. You'll see the Photos icon and a button to extract your photos. Click that!

Extracting photos and videos Clicking "Extract Photos" will comprehensively copy all of the photos from your iPhone out of your backup and to your computer. If you'd like to selectively choose which to get, you can use "Preview mode", "Expert mode" or "App view". These are described in more detail in our guide to iTunes backups.
Select a folder to transfer your images to. You'll be prompted to choose where to save your photos. Pick a handy folder and click "OK".

Select destination folder Choose whether to transfer in album groups. iPhone Backup Extractor will ask you whether you'd like to transfer all of your photos into one big folder, or into folders grouped by albums. (You can always run the process twice and do both!)

Transfer iPhone photos to PC or Mac, grouped by albums


After the transfer is finished, check out the folder you chose earlier. You'll see all of your pictures there.
Download all photos from iCloud via an iCloud backup
It's possible to transfer photos from your iPhone to your computer by downloading them from an iCloud backup.
-
Download and install iPhone Backup Extractor.
Connect iPhone Backup Extractor to your iCloud account. Click the big
+button in the bottom corner, select the “iCloud” tab, and add your login credentials. If 2FA is enabled, you'll be prompted to enter your code.
iPhone Backup Extractor adding an iCloud account Note that in order to download iCloud data it is necessary to register iPhone Backup Extractor. You can register here.
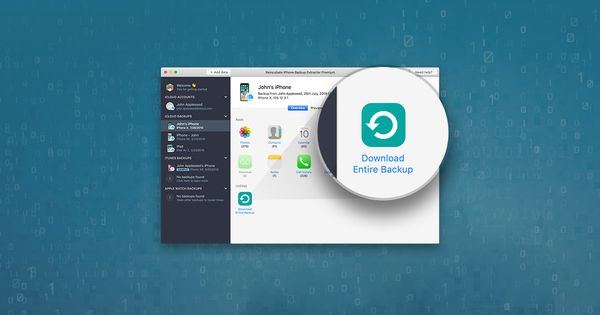
iPhone Backup Extractor will show your iCloud backups on its left-hand side. Click the most recent one, and then click "Photos" to transfer all of your photos and videos from the backup to your PC or Mac.

The download option for iCloud backup photos You'll then be asked whether you'd like to download your iCloud photos into folders grouped by albums, or in one big folder.

Extract images grouped by albums You'll also be asked which folder on your computer we should transfer the photos to:

Select destination folder A window will pop up, showing you iPhone Backup Extractor's progress in downloading your photos. It shouldn't take long!

Downloading iCloud data with iPhone Backup Extractor


It's as easy as that!
If you have iCloud Photo Library enabled, you may find some of your photos aren't stored in the backup. That's fine -- we describe how to download photos from iCloud Photo Library below.
How to download iCloud Photo Library to PC or Mac
If you'd like to fully download your iCloud Photo Library locally, in order to store your photos on your computer, or to make a backup with Dropbox or another service, it's pretty easy. Here's how:
-
Download and install iPhone Backup Extractor.
Add your iCloud account with the
+button. Then sign-in to your iCloud account. If you have 2FA enabled, you'll be prompted to enter a code.
Sign in to iCloud You'll need to register iPhone Backup Extractor in order to access iCloud data, and it'll prompt you with what you need to do.
After the sign-in is complete you'll see your iCloud account shown on the left-hand side. Select it, and you'll see the iCloud Photo Library icon appear. You can download the entire library by clicking it!

Selecting Photo Library in iPhone Backup Extractor You'll be prompted to choose a location to save your photos, and they'll be downloaded there...

Success recovering iCloud Photo Library images


Once the download has completed you will be able to see every photo from your iCloud Photo Library. This will include every image and video from any device associated with your iCloud account; even photos and videos from any shared album will be downloaded to your computer from iCloud.
Download iCloud Photo Stream to PC or Mac
Photos stored in Photo Stream in iCloud aren't part of your iCloud backup, and don't take up your iCloud storage. That's pretty neat. However, only the last 30 days of photos will be saved there, and after those 30 days the images will be removed. We've had a user write in to ask:
My iPhone was stolen and I remember I had an album called Photo Stream. How can I get those photos back?
Let's solve the problem.

Each time you're in range of a Wi-Fi connection, any new photos you've taken will be uploaded and synced to Photo Stream. If you sign in to your iCloud account and enable Photo Stream on another iOS device or computer, you'll see the same photos pop up. However, you shouldn't try to sign in to your account in Settings → iCloud on someone else's device -- or you risk their data being merged with or replaced by yours.
Instead, you can use iPhone Backup Extractor to download Photo Stream photos without needing a replacement iPhone to hand.
-
Download and install iPhone Backup Extractor (PC & Mac)
Sign in to iCloud. You can sign in by clicking on the
+button, or the "Click here to add an iCloud account" text. Our Pro edition unlocks all limitations and gives full access to downloading your iCloud and Photo Stream content.
Sign in to iCloud Explore your iCloud data or download your Photo Stream photos by clicking on your iCloud account when it appears on the left-hand side of the app. You'll see once you click on your account, icons representing your Photo Stream and other services you use in iCloud will be shown.

Downloading Photo Stream Hit download and you're done. ? Your photos will be saved to a folder of your choice on your computer.

Success recovering iCloud Photo Stream images
If you need an extra hand, we've got a video guide that takes you through the process:
Back up your iPhone regularly to prevent losing any important information.
How to transfer pictures from iPhone to PC or Mac with USB
Transferring photos from iPhone to PC
Depending on the version of Windows you have, there are potentially 3 ways to copy photos directly from your iPhone to Windows PC. However, there are pitfalls with this approach: only the "Camera Roll" photos will be copied, none of them will correctly categorise your photos into albums, and they'll be copied in a structure that may be unhelpful. That's why we recommend transferring your pictures from a backup instead.
In order to follow any of these instructions, you'll need to download and install iTunes, before restarting your PC to complete its setup process. It's a bit of a pain, and it's not necessary if you use the methods shown above with iPhone Backup Extractor.
Copying photos from an iOS device using Windows Explorer
Windows Explorer is able to access your iPhone and iPad as if it were a digital camera. You can access it over USB and copy its photos from "Camera Roll" over in one big lump. Here's how:
-
Connect your iPhone to your PC with a USB cable.
-
If your iPhone prompts you to trust the connected computer, tap "Trust" and enter your passcode.
-
Open Windows Explorer, and you'll see the iPhone appears under "Portable Devices".
-
Select the iPhone and you'll see "Internal Storage". Open that.
-
You'll see a folder or series of folders named
DCIM. These contain all of your iPhone's photos. Drag these to a folder on your computer, and they'll be copied.
You may find the copying process is slow or takes a number of attempts. If you get stuck, transfer from a backup instead.
Transferring photos using the Windows 10 "Photos" app
Windows 10's free "Photos" app can make the transfer slightly easier.
-
Connect your iPhone to your PC with a USB cable.
-
If your iPhone prompts you to trust the connected computer, tap "Trust" and enter your passcode.
-
Run the Photos app on your PC by searching for "Photos" and click it.
-
When Photos loads it should see your iPhone, and prompt you to click "Import" on its top right.
-
Select the photos you want to import, and then click "Continue".
Importing photos on Windows using AutoPlay
Users with older versions of Windows can transfer photos from their iPhone using Windows' AutoPlay feature:
-
Connect your iPhone to your PC with a USB cable.
-
If your iPhone prompts you to trust the connected computer, tap "Trust" and enter your passcode.
-
Open Windows Explorer. You should see your iPhone shown under the list of connected devices. Windows should pop this up automatically and prompt you.
-
Right-click on the iPhone and choose "Import pictures and videos".
-
Choose "Review, organize, and group items to import" to select where you'd like Windows to copy your photos.
-
Select the groups of photos you want to import, click the Import button.
Transferring photos from iPhone to Mac
Importing photos from your iPhone to your Mac is easy, as Apple's Photos app runs on both systems.
-
Connect your iPhone or iPad to your Mac with a USB cable.
-
The Photos app should automatically open on your Mac. If it doesn't, you can run it by starting Spotlight and entering "photos".
-
Your iOS device will be shown on the left-hand side of Photos. Select it, and then choose "Import All New Items" from the top right.
-
Your photos will then be imported, and you can safely disconnect your device using the eject button in Finder.
Apple provides more information on this process in their HT201302 support article.
Backing up your Photo Library
Other than wanting to recover lost or deleted photos, one of the main motivations for downloading or transferring iPhone or iCloud photos is in order to back them up.
There are many reasons for downloading your iCloud Photo Library, but the clearest benefit is insurance against data loss. The native iCloud data management options are limited which can leave you in a dangerous position. If your Photo Library database gets corrupted then you will notice missing photos, failed imports and crashes.
Downloading your iCloud Photo Library every now and then is good protection against this. iPhone Backup Extractor can download all of your photos in the iCloud Photo Library including any photos or videos that are in shared albums.
If you sync your iPhone with your Mac and have chosen the "Download Originals", it's easy to back up your iPhone's photos:
-
You can configure a regular, automatic backup using your Mac's Time Machine.
-
You can copy your Photos Library like a file, by navigating to
Users / [username] / Picturesin Finder and copying it to an external drive.
It might take a little while to create the backup!
But what about iCloud Backups?
Backups -- whether made by iTunes or on the iCloud -- are important because they contain all of a device’s information and much of it can’t be secured through simple synchronisation. If you've never made a backup, you should make one.
Backups aren't fixed in scope, and you have some control over which data iOS will include. Since cloud storage is limited for free users, it can be helpful to check the size of your iPhone’s backup and when the last backup was made. The same section shows everything inside the backup. Expanding the list will allow you to selectively back up data from apps you’re not that keen on backing up. It may be you're using hundreds of megabytes on eBooks which you already have stored elsewhere, for example.
If you enable iCloud Photo Library, not all of your device's photos will be included in iCloud and iTunes backups to avoid duplication and extra use of storage space. Instead, there's a need to back up iCloud Photo Library separately.