Composing scenes
Scenes are an easy way to compose different video feeds and backgrounds for your final output stream or video. One common example is the picture-in-picture arrangement, where a secondary video feed is overlaid on top of a primary feed, typically in a smaller frame in one of the corners of the screen. It’s so common that we ship it as the default in Camo Studio, but there's a lot more you can do, from refining an existing template to creating your own from scratch to importing a web-based template from a website like Stream Elements.

Selecting a scene
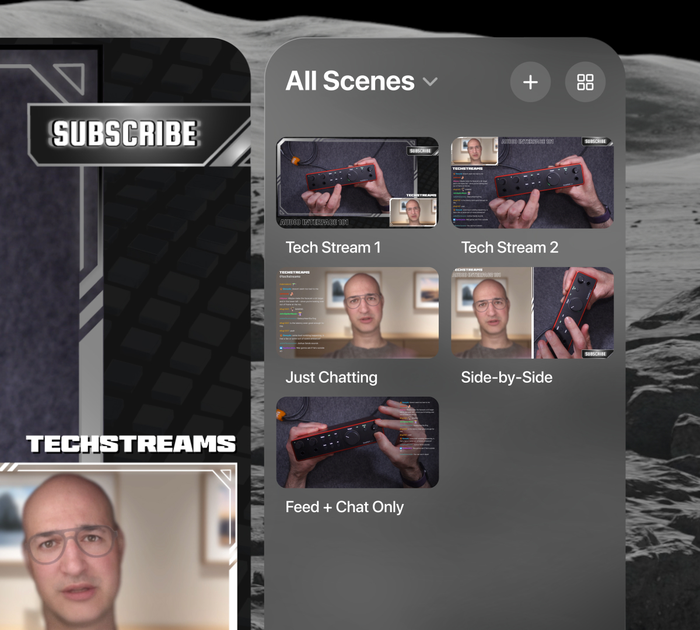
All of your scene layouts live in the right panel of the Camo Studio interface. Here, you can quickly switch between different compositions, or filter the displayed list of scenes by collection or scene type (this categorises scenes by orientation).
To manage your collections, open up the scene gallery by pinching the rightmost icon at the top of the scenes panel. In the scene gallery, you can create new collections, move scenes from one collection to another by long-pressing on the scene, and create new scenes to add directly to any collection.
Editing and configuring scenes
The fastest way to get started with scenes is to customise one of the default scenes that come with the app. These follow common patterns that should serve as a good foundation to build on, and a nice starting point to experiment with different scene settings and input feeds.
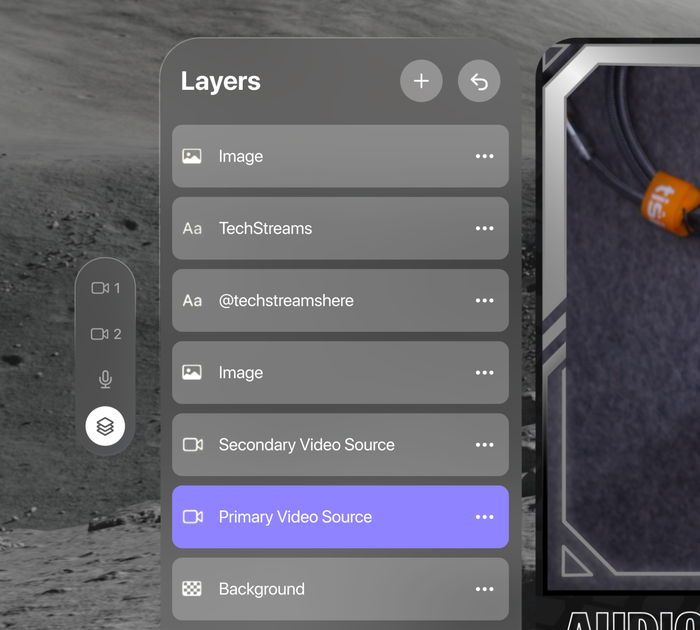
To see and then work with with the layers in your scene, just click on the Layers icon in the left-hand tab switcher. You'll then see each scene element arranged in stacked order. A long pinch will allow you to hide a layer, delete it, or move it to a different position in the hierarchy. A quick pinch will reveal options for framing it or rounding its corners. You can also add new layers, including images, text, and shapes, by pinching the + at the top of the panel.
Moving and resizing a layer in your scene is as simple as selecting its bar, dragging the element to your preferred location on the screen, and then pinching and pulling their corners to resize. You can do this at any time for quick adjustments, though preparing scenes ahead of time and switching between them will make for a smoother viewing experience. Pro tip: when creating a scene, you may find it easier to pull the Camo interface close enough to directly 'touch' and configure the layers with your finger.

Your primary and secondary video sources, along with your microphone, can be accessed via the tab switcher on the left edge of the interface. A source corresponds to where the scene gets video input, such as a connected mobile device, your Vision Persona, or your Vision view. Up to two sources can be active at a time, and each can be configured separately. There are a number of source settings available for your Persona or video from a connected device, some of which might be familiar from Camo Studio on desktop or iPad:
- Background: blur your background for added depth of field or privacy, replace it with an image, or remove it entirely for that cut-out picture-in-picture look.
- Filter: apply a colour filter to your image to achieve a stylised effect. The app comes with a gallery of different filters to choose from, and you can import your own LUTs as well.
- Spotlight: boosts your brightness relative to your environment to help you stand out from your surroundings.
- Framing: adjust the overall zoom of the frame, or use an automatic mode to ensure you’re in frame no matter where you move in the overall shot.
- Rotation and mirror video: reorient the overall frame or flip the feed.
In addition to refining the look of your video source, you can shape and frame it as you would any other layer.
Creating scenes
If you’d like to make an even more personalised scene, here are your options.
Create a scene from scratch
This will set up a blank scene with only video feeds, audio input, and a choice of background available – a quick way to get started with a simple, clean look.
Create a scene from an image
The image you choose will be used as an overlay on top of other elements in your scene, so it’s important to use an image with transparent portions where you want other elements to show. This is great for applying a simple frame to your scene to give it a particular look or theme, and there are lots of images available online that already have transparent portions in the right places.
Importing Camo Scene files
If you’re familiar with Camo Studio on macOS or Windows, you might know that it has an Overlay Editor built into it. The editor lets you compose your own overlays using icons, images, shapes, and text elements so you can easily include custom information – such as your stream details – directly in the overlay. Overlays can then be exported from Camo Studio’s Overlay Gallery in the form of a .camoscene file. Select this file in your Vision, and import it to your scene to start using it.
Creating scenes with web overlays
Web overlays are a common sight to anyone who’s watched a stream before. Similar to standard overlays, they help incorporate visuals into your scene by overlaying your video with informative and decorative elements. In addition to this, web overlays can include dynamic elements such as a live feed of a stream’s chat, visual alerts for new subscribers or other announcements, and much more. These can all be managed in the stream panels located in the left sidebar.
There are a number of platforms that offer ready-made web overlays and even let you create your own, including StreamElements, Stream Labs, and Uno Overlays. Once you have your overlay ready, simply copy its link and add it to Camo Studio for Apple Vision.
To access and monitor active stream elements like Chat, Stats, Stream Health, etc., just pinch the gauge icon in the lower control bar, makes your selection from the options under the + icon, and sign in to the relevant service. You can then position the stream panel wherever you choose.